Printing Results Are Not Satisfactory
Dirt inside the machine may affect printing results. Perform care and cleaning to the machine first. Regular Cleaning


Printouts Are Faded/Colors Turn Out Differently/White Streaks (Lines) Appear

 Did you check the paper and print quality?
Check that settings in the machine's operation panel or in the printer driver match the paper size, type, and print quality that you want to use.
Specifying Paper Size and Type
Printing
Drivers
Specifying Paper Size and Type
Printing
Drivers
 Did you check for clogging in the print head?
Print out a nozzle check pattern, and then perform print head cleaning, etc. as necessary.
Cleaning the Print Head
Cleaning the Print Head
If white streaks appear again a while after being corrected with print head cleaning, adjust the maintenance interval.
<Adjusting Maintenance Interval>
<Adjusting Maintenance Interval>
If white streaks are not corrected even after performing print head cleaning, perform white streak correction.
<White Streak Correction>
<White Streak Correction>
 Did you perform color correction (All Paper Types)?
 Did you perform color correction (Single Paper Type)?
If the steps above do not resolve the problem, perform color correction (Single Paper Type).
Correcting Colors
Correcting Colors for Each Paper Type
Correcting Colors
Correcting Colors for Each Paper Type

Color Unevenness or Colored Streaks

 Did you check the paper and print quality?
Check that settings in the machine's operation panel or in the printer driver match the paper size, type, and print quality that you want to use.
Specifying Paper Size and Type
Printing
Drivers
Specifying Paper Size and Type
Printing
Drivers
 Did you perform a print head diagnosis?
Perform a print head diagnosis.
Diagnosing the Print Head
Diagnosing the Print Head
 Did you perform color correction (Single Paper Type)?
If the steps above do not resolve the problem, perform color correction (Single Paper Type).
Correcting Colors
Correcting Colors for Each Paper Type
Correcting Colors
Correcting Colors for Each Paper Type

Colors Are Mismatched

 Did you check the paper and print quality?
Check that settings in the machine's operation panel or in the printer driver match the paper size, type, and print quality that you want to use.
Specifying Paper Size and Type
Printing
Drivers
Specifying Paper Size and Type
Printing
Drivers
 Did you perform print head position adjustment?
Adjust the position of the print head to correct color mismatching, etc.
Aligning the Print Head
Aligning the Print Head

Copies Are Not Printed Well

 Is the original placed properly on the platen glass?
 Are you copying an original that was printed out on the machine?
If copying an original that was printed out on the machine, printing may not turn out well depending on the original photo or document.
Print directly from the machine, or directly from a PC where printing from a PC is possible.
Printing
Print directly from the machine, or directly from a PC where printing from a PC is possible.
Printing
 Is the document feed scanning area dirty?

Cannot Copy Black or Near-Black Text when Color Copying

 Did you perform text color adjustment for color copies?
Perform text color adjustment if you cannot copy black or near-black text as intended when color copying.
Adjusting Values for Text Color Reproducibility
Adjusting Values for Text Color Reproducibility

Smudge Marks Appear on the Edge of Printouts

 Are you using appropriate paper?
Check the supported paper types and replace with an appropriate type. Also, set the paper size and type correctly.
Available Paper
Loading Paper
Specifying Paper Size and Type
Available Paper
Loading Paper
Specifying Paper Size and Type
 Is the paper creased or curled?
Replace with appropriate paper that is not creased or curled.
Loading Paper
Loading Paper
 Are you using thick paper outside the machine's specifications or paper that curls or wrinkles easily when absorbing ink?
Check the supported paper types and replace with an appropriate type. Also, set the paper size and type correctly.
Available Paper
Loading Paper
Available Paper
Loading Paper
 Is the paper path dirty?
Clean the paper path.
Cleaning the Paper Path
Cleaning the Paper Path
 Is the paper transport roller dirty?
Clean the paper transport roller inside the machine.
Cleaning the Paper Transport Roller
Cleaning the Paper Transport Roller

Smudge Marks Appear on the Side to Print On

 Did you check the paper and print quality?
Check that settings in the machine's operation panel or in the printer driver match the paper size, type, and print quality that you want to use.
Specifying Paper Size and Type
Printing
Drivers
Specifying Paper Size and Type
Printing
Drivers
 Is the paper creased or curled?
Replace with appropriate paper that is not creased or curled.
Loading Paper
Loading Paper
 Is the paper rubbing?
Widen the gap between the paper and print head.
Preventing Abrasion
Preventing Abrasion
 Is the document feed scanning area dirty?
 Is the interior of the machine dirty?
Clean the interior of the machine.
Cleaning the Interior
Cleaning the Interior
 Is an appropriate wait time for ink to dry set?
 Are you using paper that is hard to dry?
Try printing at a lower density.
<Density/Drying Time Adjustment>
<Density/Drying Time Adjustment>

Smudge Marks Appear on Originals

 Is the document feed scanning area dirty?

Smudge Marks Appear on the Back Side of Paper

 Have you loaded paper that is smaller than the size of the print data?
Check to make sure that the paper size matches the size of the print data.
Specifying Paper Size and Type
Specifying Paper Size and Type
 Did you check the paper and print quality?
Check that settings in the machine's operation panel or in the printer driver match the paper size, type, and print quality that you want to use.
Specifying Paper Size and Type
Printing
Drivers
Specifying Paper Size and Type
Printing
Drivers
 Did you print with a smaller-size paper immediately before?
Ink sometimes gets on the paper path or sensor areas when printing small-size paper. Clean the paper path and sensor areas.
Cleaning the Paper Path
Cleaning the Sensor Area
Cleaning the Paper Path
Cleaning the Sensor Area

The Back Side of a Printout Is Smudged by Ink from the Next Printout

 Did you adjust the density or ink drying time?
If the back side of a printout is smudged by ink from the next printout, adjusting the print density and drying time may correct the problem.
Adjusting the Density and Ink Drying Time
Adjusting the Density and Ink Drying Time

Images Bleed Through

 Is the background density appropriate?
If originals bleed through, adjust the background density for printing to turn out well.
Basic Copy Operations
Basic Operations for Sending Faxes
Adjusting Density
Basic Copy Operations
Basic Operations for Sending Faxes
Adjusting Density

A Portion of the Page Does Not Print

 Do you print data without margins?
This can occur if printing without margins is set in the printer driver. The area that is printable with this machine the area excluding 0.16 inches (4 mm) all around the paper (for envelopes, 0.39 inches (10 mm) at top and bottom).Make sure there are margins around the document to be printed.
[Finishing] tab [Advanced Settings]
  [Expand Print Region and Print]
  [Off]
[Off]
Drivers
[Finishing] tab
 [Advanced Settings]
  [Expand Print Region and Print]
  [Off]
[Off]Drivers
 Do the paper guides align with the edges of the paper?
If the paper guides are too loose or too tight, part of a document may not be printed.
Loading Paper
Loading Paper
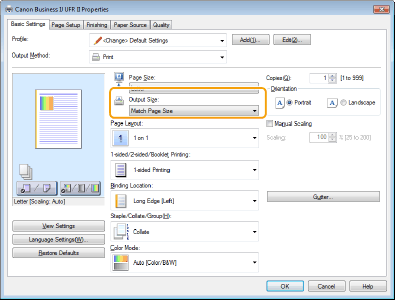
 Did you check the paper size?
Check whether settings in the machine's operation panel or in the printer driver match the paper size you want to use.

Pages Do Not Print on the Intended Side/in the Intended Direction

 Is the paper loaded in the opposite way?
Check the direction and back/front of the loaded paper. If loaded in the opposite way, reload the paper.
Loading Paper
Loading Paper

Pages Do Not Print at the Intended Size

 Are the original size and loaded paper size different?
Replace the loaded paper with paper of the size you want to print.

Orientations of Back and Front Do Not Match for 2-Sided Printing

 Is the 2-sided print setting correct?
Check print settings with the following procedure.
1 In the print settings screen for the application, select the direction of the original.
2 In the driver's [Basic Settings] screen, set [Orientation] to the same direction as in step 1.
3 While checking the print image, set [Page Layout: <Value>] [Page Order]
  [1-sided/2-sided/Booklet Printing]
  [Binding Location: <Value>].
Drivers
1 In the print settings screen for the application, select the direction of the original.
2 In the driver's [Basic Settings] screen, set [Orientation] to the same direction as in step 1.
3 While checking the print image, set [Page Layout: <Value>]
 [Page Order]
  [1-sided/2-sided/Booklet Printing]
  [Binding Location: <Value>].
Drivers

Lines Are Missing or Do Not Print

 Did you specify Page Layout: N on 1?
 Did you set a gutter width with [Gutter: <Value>]?
Thin lines may not print. Try setting thicker lines.
Try changing settings in one of the following ways.
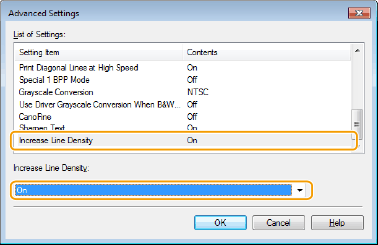
- Change the following settings in the printer driver.
[Quality] tab  [Advanced Settings]
  [Increase Line Density]
  [On]
[On]
[Quality] tab [Advanced Settings]
  [Sharpen Text]
  [Off]
[Off]

Drivers
 [Advanced Settings]
  [Increase Line Density]
  [On]
[On][Quality] tab
 [Advanced Settings]
  [Sharpen Text]
  [Off]
[Off]
Drivers
- Change the following settings on the operation panel.
Select <Menu> <Function Settings>
 <Printer>
 <Printer Settings>
 <Print Quality>
 <Increase Line Density>
 <On>
<On>
 <Function Settings>
 <Printer>
 <Printer Settings>
 <Print Quality>
 <Increase Line Density>
 <On>
<On>Select <Menu> <Function Settings>
 <Printer>
 <Printer Settings>
 <Print Quality>
 <Sharpen Text>
 <Off>
<Off>
 <Function Settings>
 <Printer>
 <Printer Settings>
 <Print Quality>
 <Sharpen Text>
 <Off>
<Off>
Printouts Turn Out Black and White

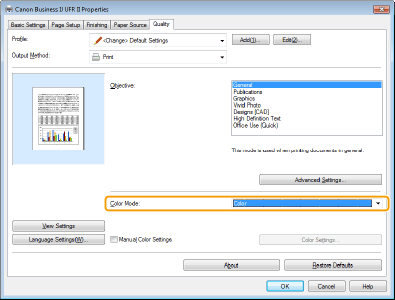
 Is [Color Mode] set to [Black and White] in a Windows printer driver?

Images are Printed Tilted or Are Outside the Printable Area

 Did you adjust margins?
If images are printed tilted or are outside the printable area, adjust margins.
Adjusting Margins
Adjusting Margins

White text and lines on black or color backgrounds tend to be filled in

 Try changing settings in one of the following ways.
Change the following settings in the printer driver
Select [Quality] tab [Advanced Settings]
 [Sharpen Text]
 [On]
[On]
Select [Quality] tab
 [Advanced Settings]
 [Sharpen Text]
 [On]
[On]Change the following settings on the operation panel.
Select <Menu> <Function Settings>
 <Printer>
 <Printer Settings>
 <Print Quality>
 <Sharpen Text>
 <On>
<On>
Select <Menu>
 <Function Settings>
 <Printer>
 <Printer Settings>
 <Print Quality>
 <Sharpen Text>
 <On>
<On>
