Correcting Colors in All Paper Types
Perform color correction automatically for all paper types. All correction data for color correction done with "Single Paper Type" is changed.
Correction involves repeating printing out and then scanning an adjustment image 2 times.
Prepare the following paper.
Plain paper (recycled paper can be used)
Correction involves repeating printing out and then scanning an adjustment image 2 times.
Prepare the following paper.
Plain paper (recycled paper can be used)
Size: any of A3, 11x17, LTR, or A4
A3 or 11x17 is recommended.
A3 or 11x17 is recommended.
Sheets: 2
1
Load paper in a paper drawer or the multi-purpose tray.
Make paper settings also. Loading Paper
2
Select <Menu> in the Home screen. Home Screen
3
Select <Adjustment/Maintenance>  <Adjust Image Quality>
  <Color Correction>
  <Auto (Pattern Scan)>.
 <Adjust Image Quality>
  <Color Correction>
  <Auto (Pattern Scan)>.
4
Select <All Paper Types>.
5
Check that the size and type of paper displayed on the screen is loaded in the machine, and select <Next>.
6
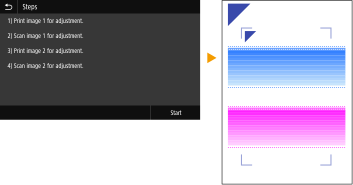
Confirm the procedure, and select <Start>.
The first adjustment image is printed.

7
When the screen <Processing... Do not turn OFF the device.> is displayed, wait about 2 minutes before going to the next operation.
8
When the screen <Place the 1st alignment pattern as shown and scan it.>, open the feeder.
9
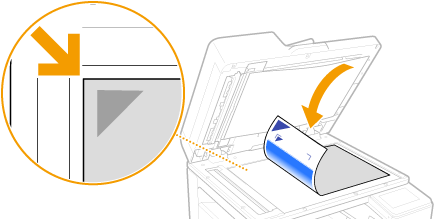
Place the first adjustment image on the platen glass.
Place the adjustment image with the print side facing down and the  mark in the upper left corner of the machine.
 mark in the upper left corner of the machine.
10
Gently close the feeder.
11
Select <Start Scanning>.
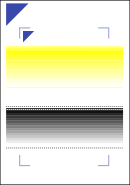
The placed adjustment image is scanned, and then the second adjustment image is printed.

12
When the screen <Processing... Do not turn OFF the device.> is displayed, wait about 2 minutes before going to the next operation.
13
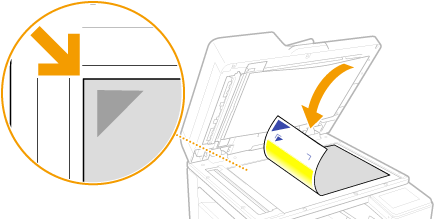
When the screen <Place the 2nd alignment pattern as shown and scan it.>, open the feeder, remove the first adjustment image, and then place the second adjustment image on the platen glass.
In the same way as for the first adjustment image, place the adjustment image with the print side facing down and the  mark in the upper left corner of the machine.
 mark in the upper left corner of the machine.
14
Gently close the feeder.
15
Select <Start Scanning>.
The placed adjustment image is scanned and adjustment starts.
16
When a message appears notifying that adjustment is complete, open the feeder, and remove the second adjustment image.
17
Gently close the feeder.
 |
If the <Could not perform correction.> message is displayedDid you load the paper displayed in step 5 into the paper source?
Did you place the adjustment image with the print side face down, with the
 mark in the upper left corner of the machine? mark in the upper left corner of the machine?Is the printout soiled?
If this does not correct color unevennessPrint out a nozzle check pattern and check that no miscolored lines are present (Checking the Condition of the Nozzles). Next perform correction for all paper types again.
To return corrected values to initial valuesIn the <Auto (Pattern Scan)> screen, select <Restore Initial Settings>.
|