Diagnosing the Print Head
Diagnose the print head, colors, and color mismatch, and correct any problem. Diagnosis might take about 40 minutes.
Prepare the following items.
Prepare the following items.
|
Head diagnosis
|
 |
|
Color diagnosis
|
 |
|
Color mismatch diagnosis
|
 |
Plain paper (recycled can be used)
Size: any of A3, 11x17, LTR, or A4
A3 or 11x17 is recommended.
A3 or 11x17 is recommended.
Sheets: 5
All 5 sheets may not be required.
All 5 sheets may not be required.
Paper clean and white on both front and back
 |
|
Image diagnosis and adjustment use ink. A portion of this ink is also taken up by the maintenance cartridge. Check the amounts remaining in the ink tanks and maintenance cartridge beforehand. If the amounts remaining are low, it is recommended that you prepare replacements. Checking Remaining Amounts and Usage of Consumables
|
1
Load paper in a paper drawer or the multi-purpose tray.
Make paper settings also. Loading Paper
2
Select <Menu> in the Home screen. Home Screen
3
Select <Adjustment/Maintenance>  <Maintenance>.
 <Maintenance>.
4
Select <Print Head Diagnostics>.
5
Check content displayed on the screen, and select <Start Diagnostics>.
Diagnosis proceeds through "(print head diagnostics) - (uneven color diagnostics) - (color mismatch diagnostics)".
6
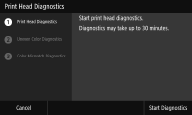
Begin print head diagnosis. 

|
1
|
Check content displayed on the screen, and select <Start Diagnostics>.
Print head diagnosis begins.
|
|
2
|
If a message is displayed prompting cleaning, select <Yes>.
Once cleaning completes, diagnosis proceeds to colors.
Select <No>
 <Yes> to complete print head diagnosis, color diagnosis, and color mismatch diagnosis and then display diagnosis results. <Yes> to complete print head diagnosis, color diagnosis, and color mismatch diagnosis and then display diagnosis results. |
7
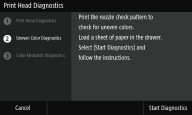
Begin color diagnosis. 

|
1
|
Check content displayed on the screen, and select <Start Diagnostics>.
Select <Cancel>
 <Yes> to complete diagnosis and display diagnosis results. <Yes> to complete diagnosis and display diagnosis results. |
|
2
|
Check the paper that can be used on the screen.
|
|
3
|
Check that 5 sheets of paper that can be used are loaded, and then select <Next>.
|
|
4
|
Select <Start>.
A nozzle check pattern is printed.
|
|
5
|
Check the check pattern, and select <A> or <B>.
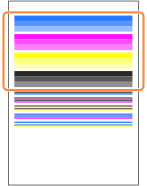 If you selected <A>, proceed to step 6.
If you selected <B>, proceed to step 7.
 The check pattern is also used in the following color mismatch diagnostic; do not discard.
|
|
6
|
Select <Close>.
Color diagnosis completes, and diagnosis proceeds to color mismatch.
|
|
7
|
Check content displayed on the screen, and select <Yes>.
Color correction begins.
Select <No> to proceed to color mismatch diagnosis without correcting colors.
|
|
8
|
Check the paper that can be used on the screen.
|
|
9
|
Check that 4 sheets (2 or more) of paper that can be used are loaded, and then select <Next>.
|
|
10
|
Confirm the procedure, and select <Start>.
The first adjustment image is printed.
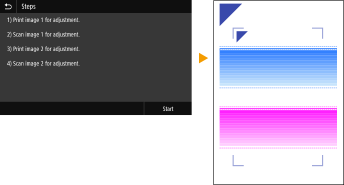 Wait about 2 minutes.
|
|
11
|
Open the feeder after the screen displayed during printing disappears.
|
|
12
|
Place the first adjustment image on the platen glass.
Place the adjustment image with the print side facing down and the
 mark in the upper left corner of the machine. mark in the upper left corner of the machine.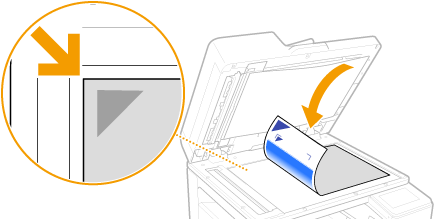 |
|
13
|
Gently close the feeder.
|
|
14
|
Select <Start Scanning>.
The placed adjustment image is scanned, and then the second adjustment image is printed.
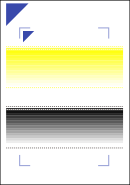 Wait about 2 minutes.
|
|
15
|
Open the feeder, remove the first adjustment image, and then place the second adjustment image on the platen glass with the print side face down.
In the same way as for the first adjustment image, place the adjustment image with the print side facing down and the
 mark in the upper left corner of the machine. mark in the upper left corner of the machine.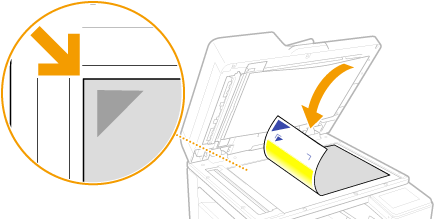 |
|
16
|
Gently close the feeder.
|
|
17
|
Select <Start Scanning>.
The placed adjustment image is scanned, and color correction starts.
|
|
18
|
Open the feeder and remove the second adjustment image.
 If a third adjustment image has been printed, repeat the procedure from step 15.
|
|
19
|
Close the feeder gently.
Color unevenness diagnosis completes, and diagnosis proceeds to color mismatch.
|
8
Begin color mismatch diagnosis. 

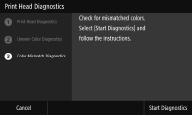
|
1
|
Check content displayed on the screen, and select <Start Diagnostics>.
Select <Cancel>
 <Yes> to complete diagnosis and display diagnosis results. <Yes> to complete diagnosis and display diagnosis results. |
|
2
|
Check the nozzle check pattern printed for diagnosing color unevenness, and select <A> or <B>.
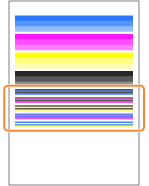 If you selected <A>, proceed to step 3.
If you selected <B>, proceed to step 4.
|
|
3
|
Select <Close>.
Color mismatch diagnosis completes, and diagnosis results are displayed.
|
|
4
|
Check content displayed on the screen, and select <Yes>.
Select <No> to complete color mismatch diagnosis without correcting color mismatch and display diagnosis results.
|
|
5
|
Check that the size and type of paper displayed on the screen is loaded in the machine, and select <Next>.
|
|
6
|
Confirm the procedure, and select <Start>.
An adjustment image is printed.
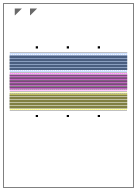 |
|
7
|
Open the feeder after the screen displayed during printing disappears.
|
|
8
|
Place the adjustment image on the platen glass.
Place the adjustment image with the print side facing down and the
 mark in the upper left corner of the machine. mark in the upper left corner of the machine.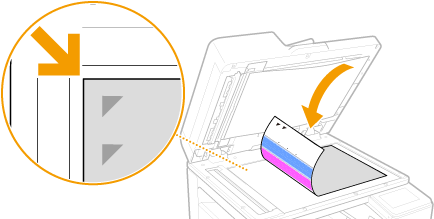 |
|
9
|
Gently close the feeder.
|
|
10
|
Select <Start Scanning>.
The placed adjustment image is scanned, and color mismatch correction starts.
|
|
11
|
Open the feeder and remove the adjustment image.
|
|
12
|
Gently close the feeder.
|
9
Check the diagnosis results and select <Close>.
10
Select <Close>.