Scanning (Sending by E-mail)
Scan an original and send the scan data as an email attachment.
The same as when normally sending email, you can specify several destinations, and also set a subject and type a message.
Prepare Beforehand
Sending scanned data from the printer as an email attachment
-
Load the original.
-
In the Home screen, select Scan.
-
Select Email.
-
Specify destinations with the Specify Destination tab.
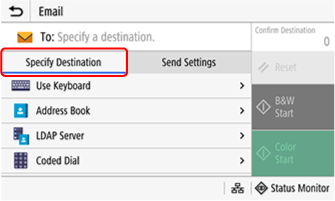
-
Make scan settings with the Send Settings tab.
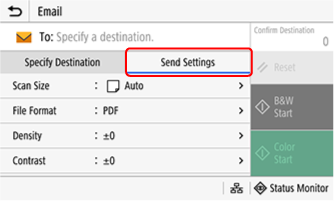
 Note
Note-
The email subject, message, etc. can also be made with the Send Settings tab.
-
-
Select B&W Start or Color Start.
Original scan begins.
-
If the Confirm Destination screen appears
Check that the destination is correct and select Start Scanning.
-
If the SMTP Authentication screen appears
Enter the user name and password for SMTP authentication, and select Apply.
Note-
To stop scanning select Cancel or press the Stop button.
-
Check the send job status and log from Status Monitor.
-
-
Holding the original to prevent it from falling, select OK.
The retainer releases the original, so allow the original to move. The scan data is sent.
-
If The send job has been accepted. appears
To check the send status or log, select Status Monitor.
Note-
Scan data is sent with the following file name.
"XXXX_YYYYYYYYYYYY_001.pdf" (the X string is the transmission tracking number, and the Y string is the send date/time)
You can also specify any string of characters to add to the start of the file name with the scan settings.
-
