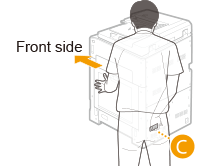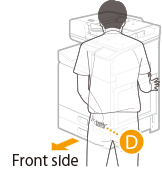
When Machine May Tilt during Transport (No Long-Period Storage of 6 Months or More after Transport)
The method for transporting the machine differs with whether the machine will be used within 6 months after transport or stored for more than 6 months without use after the machine has been transported. If the machine will be used within 6 months, operate the machine as follows before transport.
 |
|
Be careful that the tilt angle while being transported is no more than 40 degrees.
|
1
Check and prepare the required number of ink tank and maintenance cartridge replacements.
 |
|
 |
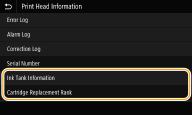
You can check information on the required number of ink tank and maintenance cartridge replacements at <Replacement Rank> in <Print Head Information>.
<Status Monitor>  <Device Information>
  <Print Head Information>
  <Ink Tank Information>
 <Device Information>
  <Print Head Information>
  <Ink Tank Information>
After reinstalling the machine after transport, consumables are required according to their replacement rank. Print out a report of the print head information you checked. Printing Reports on the Usage Condition of the Machine
The required number is different for each replacement rank. Refer to  for replacement rank and required number of replacements.
 for replacement rank and required number of replacements.
2
Check for a print head locking rod.
|
1
|
Select <Menu>
 <Adjustment/Maintenance> <Adjustment/Maintenance>  <Maintenance> <Maintenance>  <Maintenance Cartridge Replacement> in the Home screen. <Maintenance Cartridge Replacement> in the Home screen. |
|
2
|
Select <Unlock>, and when the screen changes, open the front cover.
|
|
3
|
Check that the print head locking rod is present.
|
|
4
|
Close the front cover.
 If the print head locking rod is not present, contact your dealer or the service center and again obtain a print head locking rod. Transporting the machine without a print head locking rod will result in malfunction.
|
3
Remove any paper.
Remove all paper from the paper drawers and multi-purpose tray.
4
Select <Menu> in the Home screen. Home Screen
5
Select <Adjustment/Maintenance>  <Maintenance>.
 <Maintenance>.
6
Select <Preparation for Transporting>.

If an error occurs indicating the amount of ink is unknown, the <Preparation for Transporting> menu cannot be run.
7
Enter <System Manager ID> and <PIN>, and select <Log In>.
8
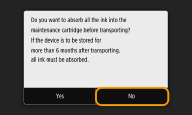
Check the message, and select <No>.
9
Check the message, and select <Yes>.

Once you have begun preparation to transport the machine, it cannot be halted. If no consumables replacements are ready, do not start preparation.
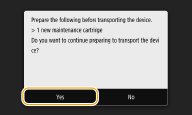
10
When the screen for checking presence of a print head locking rod appears, select <No>.
The machine begins preparation for transport. Preparation takes 15 to 20 minutes.
11
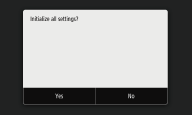
In the screen for selecting to initialize settings, select <Yes> or <No>.
By selecting <Yes>, restores all data including logs and setting values to their default settings at time of purchase. Select this at times such as when the user of the machine changes.
12
Select <Unlock>.
13
When <Open Front Cover> is displayed, open the front cover.
14
Remove the maintenance cartridge. Replacing the Maintenance Cartridge
Place the maintenance cartridge in a plastic bag, and close firmly to prevent ink from spilling out.
15
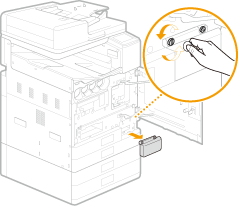
Remove the handhold cover.
16
Close the front cover.
17
Select <Unlock>.
18
When <Open Front Cover> is displayed, open the front cover
19
Attach the print head locking rod.
Remove the print head locking rod stowed in the machine (Interior), and insert it in the slot.
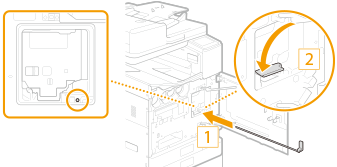
After pushing it all the way, lower the lever to the left.
20
Close the front cover.
21
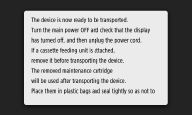
Turn OFF the machine. Turning OFF the Machine
22
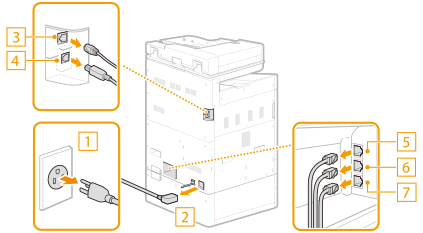
Disconnect the cables and cord from the machine in numerical order as in the illustration below.
The shape of the power plug (*1) depends on your country or region.
Whether the cables with "*2" are connected depends on your environment.
 Power plug*1 Power plug*1 Power cord Power cordUnfasten the power cord clamp and remove the power cord.
 LAN cable*2 LAN cable*2 USB cable*2 USB cable*2 Handset*2 Handset*2 External telephone*2 External telephone*2 Telephone cable*2 Telephone cable*2 |
 |
23
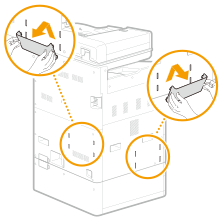
Remove the book holder.
24
Remove the paper drawer cover.
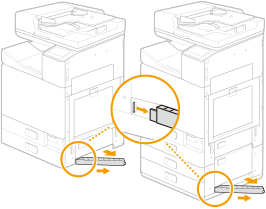
 If an optional cassette feeding unit is installed.
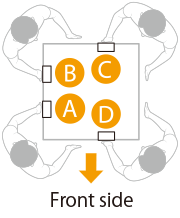
The machine is heavy (Other Specifications). Using the handholds, be sure to lift with 4 people.
|
1
|
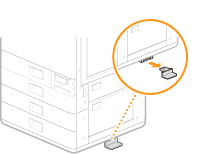
Remove the stabilizer from the right side of the cassette feeding unit.
The stabilizer will also be required after transporting the machine. Do not discard and store in a safe place.
 |
||||||
|
2
|
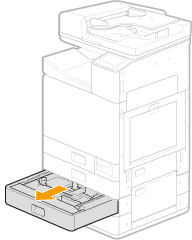
Pull out paper drawer 3 slightly.
 |
||||||
|
3
|
Turn the screws fastening the machine and the cassette feeding unit and remove the pedestal cover.
Front of main unit
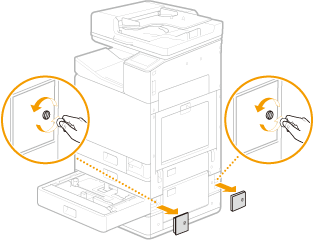 Left of main unit
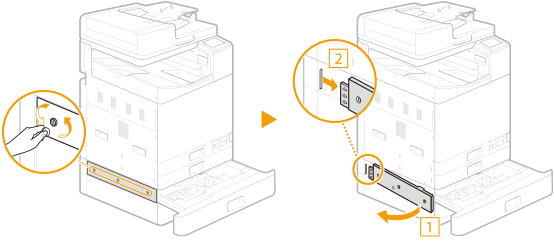 |
||||||
|
4
|
Close paper drawer 3.
|
||||||
|
5
|
Remove the connector cover from the main unit and cassette feeding unit, and remove the cassette feeding unit connector.
 |
||||||
|
6
|
Use the handholds to remove the main unit.

|
25
Bundle the machine.
Tape the 3 locations on the right side of the machine in an "H" shape as shown below.
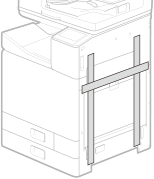
26
Bundle the optional cassette feeding unit.
To transport the cassette feeding unit, be sure to lift with two or more people, being careful not to injure backs, etc. See below for how to hold.
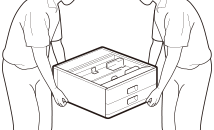
 to
to  .
.
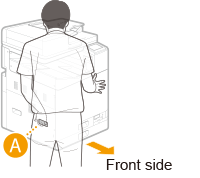
 with right hand, and support with left hand
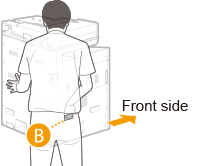
 with right hand, and support with left hand