
Item Edit Screen
You can import photos to image layout frames in your item or add stamps and text boxes.
Switch to the Item edit screen by one of the following operations.
- While creating a new item, select the photo you want to use in the Photo Locations screen
- Click the thumbnail of a saved item in the Your Items screen
![]() Note
Note
- Available editing functions vary depending on the item.
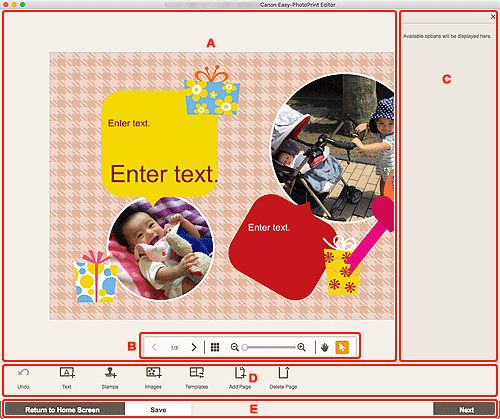
A: Item Edit Area
Displays your item's preview.
Enter text or change the orientation and position of images.
B: Viewing Tools Area

 (Previous Page/Next Page)
- Switches the displayed page when there are multiple pages in the item.
 (Thumbnail List View)
- Click to switch to the Item edit screen (thumbnail list view).
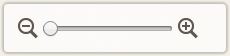 (Zoom Out/Zoom In)
- Click
 (Zoom Out) or
  (Zoom In) to reduce or enlarge the display size. You can also freely change the display size by dragging the slider.
  (Hand Tool)
- Drag the item until the area you want to see is displayed (for example, when an enlarged item does not fit in the screen).
 (Select Object Tool)
- Select an image, text, or stamp.
C: Sidebar
Select  (Text),
  (Stamps),
  (Background Colors),
  (Frames), or
  (Creative Filters) in the Editing tools area to display the corresponding settings or list.
D: Editing Tools Area
![]() Note
Note
- The displayed contents vary depending on the item.
- The displayed contents vary when an image or text is selected.
 Undo
Undo-
Undoes the last operation.
Each click restores the previous state.
- Text
-
Add text boxes.
Select from Vertical, Horizontal, Arch Up, and Arch Down.
When you enter text, the Text palette appears on the Sidebar of the Item edit area.
 Note
Note- Arch Up and Arch Down appear when creating a disc label.
- Stamps
-
Displays the Stamps palette on the Sidebar of the Item edit area and you can add stamps.
 Images
-
Displays the Photo Locations screen and you can add or change photos.
- Background Colors
-
Displays the Background Colors palette on the Sidebar of the Item edit area and you can change the background color of your item.
 Templates
-
You can change the template.
 Add Page
-
Adds a new page after the selected page.
 Delete Page
-
Deletes the selected page.
 Advanced...
-
Specify the settings for calendars, disc labels, business cards, stickers, or ID photos.
When image or text is selected:
 Select Image
-
Displays the Photo Locations screen and you can change photos.
- Frames
-
Displays the Frames palette on the Sidebar of the Item edit area and you can add frames to images.
 Crop
Crop-
Switches to the Crop screen and you can crop images.
- Creative Filters
-
Displays the Creative Filters palette on the Sidebar of the Item edit area and you can turn images black and white, enhance them to resemble retro images, and more.
 Bring to Front
- Moves an image, text, or stamp to the front.
 Send to Back
- Moves an image, text, or stamp to the back.
 Align
Align-
Align images, text, or stamps.
Select from Align Left, Align Center, Align Right, Align Top, Align Middle, Align Bottom, Distribute Horizontally, Distribute Vertically, Align Selected Objects, and Align to Page Edge.
E: Switch Screen/Save Area
- Return to Home Screen
-
Return to the home screen.
If clicked before saving the item, the Discard Changes screen appears.
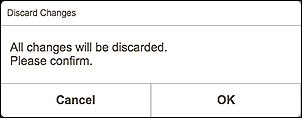
Click OK to return to the home screen without saving the item. To save the item, click Cancel, and then click Save in the Item edit screen.
- Save
-
Save the item.
The destination folder cannot be changed.
- Next
-
The view switches to the Print Settings screen.
