Registering Printer to Cloud Integration Service
Follow the steps described below to register the printer to the cloud integration service server.
 Note
Note
- When a new message about your printer is received,
 will appear on the printer's home screen, depending on the model of printer you are using.
Check that the printer is connected to the Internet
To use this function, you must connect this printer to the Internet.
-
Display the main screen of the Cloud
You can display the main screen of the Cloud by one of the following options.
- From the printer screen, select
 ->
->  Cloud applications.
 - From the printer screen, select
 Cloud or
  .
.
 Note
Note- If multiple users will be using the printer after the initial registration, select the login user name from the Switch user screen, enter the Security code, and proceed with the registration.
If the Security code is incorrect, use your smartphone, tablet, or computer, and change the setting from the My account of the Canon Cloud Printing Center.
- From the printer screen, select
-
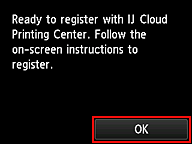
When the registration preparation completed screen appears, select OK

-
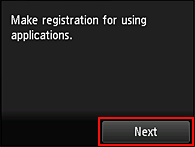
On the confirmation screen, select Next

-
In the Terms of use and Privacy policy windows, read the statements, and then select Agree if you agree
 Note
Note- If you select Disagree, a confirmation screen asking whether you want to cancel Register My account appears. If you select Yes, then Register My account is canceled, and you return to the Home screen.
Even if you select Disagree, you can still use this service by selecting Agree from the registration screen later. - You can print the displayed information by pressing the Start button.
- If you select Disagree, a confirmation screen asking whether you want to cancel Register My account appears. If you select Yes, then Register My account is canceled, and you return to the Home screen.
After you complete the registration, you can print photos and documents that have been uploaded to apps on the linked cloud integration service and add/delete/sort apps.
