Using Cloud Integration Service
-
Download Canon PRINT, and start it.
Download Canon PRINT -
Tap Cloud on the main screen.
![]() Note
Note
- If you want to use management features like usage restrictions, see "Using Cloud Integration Service from a Web Browser".
For screen descriptions and operation instructions, see "Cloud Integration Service Screen Descriptions".
Printing procedure
This section introduces the photo printing procedure by using "image.canon" as an example.
-
On the Main screen, select image.canon
-
In the displayed album list, select the album of your choice
-
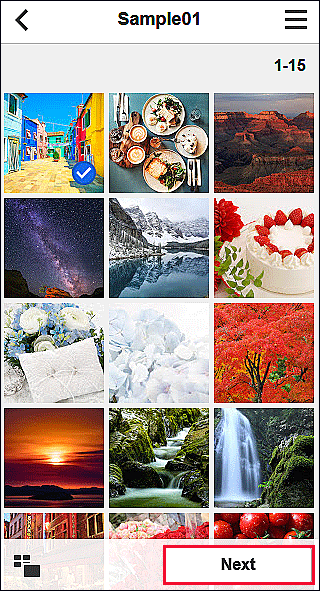
In the displayed image list, select the image that you want to print, and then select Next
-
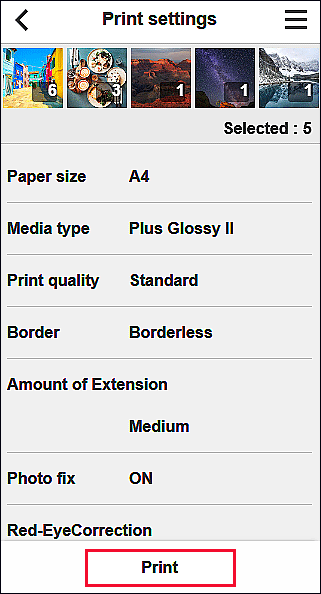
Make the necessary print settings, and then select Print
-
To start printing, select OK
A message indicating that the print job was sent appears, and printing starts.
To continue printing, select Print other images, and perform the operation from Step 3.
To stop printing, tap the Close button.
![]() Important
Important
- If a print job is not printed within 24 hours after the print job is sent, the print job will expire and cannot be printed.
