Loading Preprinted Paper
When you load paper that has been preprinted with a logo, pay attention to the orientation of the paper regardless of whether you use the paper drawer or the multi-purpose tray. Load the paper properly so that printing is performed on the same side as the logo.

 |
||||||||||||||||||||||||||||||||||||||||||||
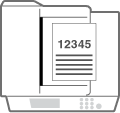
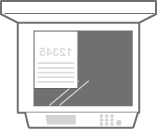
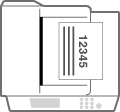
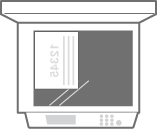
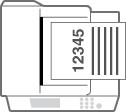
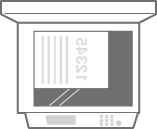
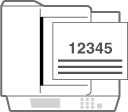
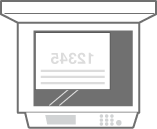
When performing a copy operation, also pay attention to the orientation of the original documentPlace the original in the feeder with the side to copy face up, or place the original on the platen glass with the side to copy face down, as shown in the following illustrations.
|
 |
|
This section describes how to load preprinted paper with the proper orientation. For a description of the general procedure for loading paper in the paper drawer or multi-purpose tray, see Basic Paper Loading Method.
|
Loading Paper with Logos in the Paper Drawer
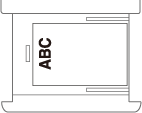
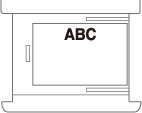
Load the paper with the logo printed side (the side to print) face up, as shown in the following illustrations.
|
Portrait orientation paper
|
|
The printing results
|
 |
 |
 |
|
|
|
|
|
Landscape orientation paper
|
|
The printing results
|
 |
 |
 |
Loading Paper with Logos in the Multi-Purpose Tray
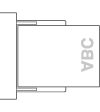
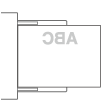
Load the paper with the logo printed side (the side to print) face down, as shown in the following illustrations.
|
Portrait orientation paper
|
|
The printing results
|
 |
 |
 |
|
|
|
|
|
Landscape orientation paper
|
|
The printing results
|
 |
 |
 |
