
Manual Adjustment to Straighten Lines and Colors
If vertical lines on the printed document are misaligned or a color shift occurs, adjust the print head position. When Print Head Alignment - Manual is performed, the adjustment pattern will be printed. Check the print result and enter the setting value.
![]() Important
Important
-
Since the adjustment result depends on the type of paper, adjust with the paper used for printing.
![]() Note
Note
-
Using automatic print head adjustment is recommended.
Items to Prepare
- When Using Rolls
-
Roll at least 11.69 in. (297.0 mm) wide
- When Using Sheets
-
Two sheets of A4 / Letter / A3 size paper
-
Load paper.
-
Select
 (Setup) on the HOME screen.
 -
Select
 Maintenance.
 -
Select Print Head Alignment - Manual.
-
Check message and select Yes.
-
Select Roll paper or Top feed.
The print head alignment pattern will be printed.
-
When Did the patterns print correctly? appears, make sure pattern was printed correctly, and if so, select Yes.
-
Check message and select Next.
-
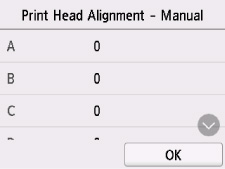
Examine first patterns and select A. In column A, find pattern in which stripes are least noticeable, and then select the number of that pattern.

 Note
Note-
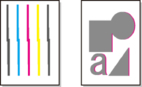
If all patterns look different, choose the pattern in which vertical stripes are least noticeable.
Subtle vertical stripes

Noticeable vertical stripes

-
If all patterns look different, choose the pattern in which horizontal stripes are least noticeable.
Subtle horizontal stripes

Noticeable horizontal stripes

-
-
Repeat these steps until you have finished entering pattern numbers for columns B to L, and then select OK.
-
Check message and select OK.
The second set of patterns is printed.
-
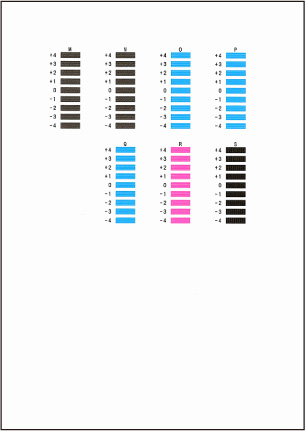
Examine second patterns and select M. In column M, find pattern in which stripes are least noticeable, and then select the number of that pattern.
-
Repeat these steps until you have finished entering pattern numbers for columns N to S, and then select OK.
-
When confirmation message appears, select OK.
