
Sending Scanned Data as E-Mail from Machine
You can send scanned data as an e-mail from the printer.
Before you use this function, check the following.
-
The printer is connected to a LAN.
Make sure the printer is connected to a LAN correctly.
-
Mail server settings are completed using Remote UI.
-
Settings for sending scanned data as an e-mail are specified using Remote UI.
Follow the procedure below to send the scanned data as an e-mail from the printer.
-
Flick HOME screen and tap
 Scan.
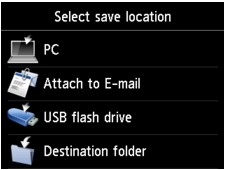
Scan.The screen for selecting to which you save the data is displayed.
-
Tap
 Attach to E-mail.
 -
Tap
 E-mail directly from device.
 -
Tap Select recipients.
-
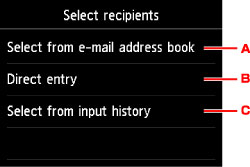
Specify recipient(s).
-
Tap to select the recipient(s) from the address book.
-
Tap to enter recipient's e-mail address.
-
Tap to select the recipient(s) from the input history.
-
-
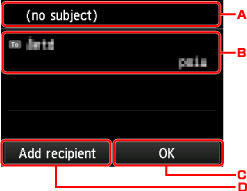
Perform mail sending settings.
The screen below appears.
-
Tap to enter the subject.
-
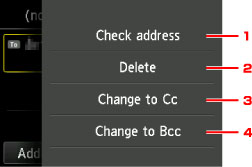
Tap to select the items below.
-
Tap to check the address. Tapping Edit allows you to change the address.
-
Tapping here and selecting Yes deletes the recipient.
-
Tap to change to Cc (carbon copy).
-
Tap to change to Bcc (blind carbon copy).
 Note
Note- To change Cc or Bcc to To, tap the recipient and tap Change to To.
-
-
Tap to complete specifying the recipient.
-
Tap to add the recipient.
-
-
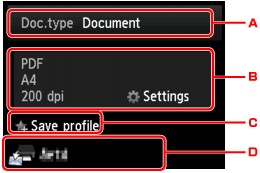
Specify settings as necessary.
-
Tap to select the document type.
- Document
- Scans the original on the platen glass or in the ADF as a document data applying the settings specified in Scan settings.
- Photo
- Scans the original on the platen glass as a photo data applying the settings specified in Scan settings.
-
Tap to display Scan settings screen.
For more on the setting items:
-
Tap to register the current scan settings as a custom setting.
-
Tap to display the screen to select the destination.
-
-
Press Color button for color scanning, or Black button for black & white scanning.
Note- If the original is not loaded properly, a message is displayed on the touch screen. Load the original on the platen glass or in the ADF according to the scan settings.
-
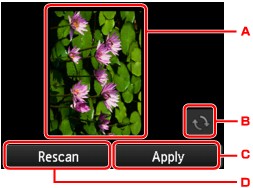
If you select ON for Preview on the scan setting screen:
The preview screen is displayed before sending the scanned original as an e-mail.
-
The preview screen of the scanning data is displayed.
-
Tap to rotate the preview screen.
Displayed when you select PDF or Compact PDF for Format on the scan setting screen.
-
Tap to send the scanned original as an e-mail.
-
Tap to rescan the original.
-
-
If you load the original in the ADF:
The printer starts scanning and scanned data is sent as an e-mail.
-
If you load the original on the platen glass:
-
When you select JPEG for Format on the scan setting screen, the printer starts scanning and scanned data is sent as an e-mail.
-
When you select PDF or Compact PDF for Format on the scan setting screen, the confirmation screen asking you if you continue scanning is displayed after scanning is complete.
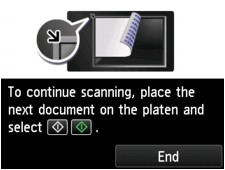
If you continue scanning, load the original on the platen glass and start scanning.
If you do not continue scanning, tap End. The scanned data is sent as an e-mail.
Remove the original on the platen glass or from the document output slot after scanning is complete.
-
Checking Send Log
Tapping Check send log on E-mail directly from device displays the items below.
-
Display send log
Displays the send log of the printer (up to 100). Tap the item to check more information.
-
Print send log
Prints out the send log of the printer. Tap Yes to start printing.
