
Sending Notification of Print Job or Printer Status to Smartphone/Tablet PC
You can notify a smartphone or tablet (hereafter, smartphone) that print jobs are finished/stopped or printer errors/warnings occur.
Use the following procedure to send notifications about print jobs that are finished/stopped or printer errors/warnings to a smartphone.
-
Adding Users to Device Management Console
Add users who will be sent notifications using Device Management Console.
-
Registering Smartphones Using Canon PRINT Inkjet/SELPHY
Use Canon PRINT Inkjet/SELPHY to register smartphones to a server (hereafter, notification server) to send notifications.
-
Setting Notifications to Additional Users by Using Device Management Console
Use Device Management Console to do settings related to notifications for additional users.
You also need to input the user name of the computer that executes the print job while doing the settings in the above procedure.
-
Confirm the user name of the computer that executes the print job and the user name that was added to Device Management Console.
![]() Important
Important
- The resident service must be started to send notifications to smartphones. To start the resident service, see "Starting the Resident Service."
- You may not be able to use the smartphone notification function, depending on the country or region in which you live.
- You may not be able to use the smartphone notification function, depending on the model you are using. You can check if your printer supports this function in the Check Compatible Printers dialog box. For details about the Check Compatible Printers dialog box, see "Check Compatible Printers Dialog Box."
- Your smartphone is notified periodically during a printer error or warning.
![]() Note
Note
- You need to install Canon PRINT Inkjet/SELPHY on your smartphone to receive notifications about print jobs finished/stopped and printer errors/warnings.
- The proxy server must be set up to notify your smartphone or tablet in an environment that is connected to the internet via a proxy server. Do the settings for the proxy server in the Proxy Server Setup dialog box. For details, see "Proxy Server Setup Dialog Box."
Adding Users to Device Management Console
Add users to the Device Management Console who want to notify you of the print jobs finidhed/stopped or printer errors/warnings status.
-
On the File menu, select Smartphone/Tablet Notifications > User Notification Settings.
The User Notification Settings dialog box appears.
-
Click Add button.
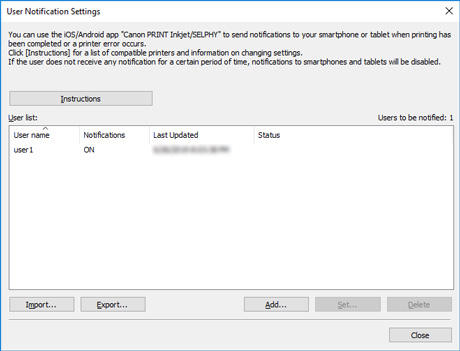
The Add User dialog box appears.
 Note
Note- Click the Instructions button to display "Sending Notification of Print Job or Printer Status to Smartphone/Tablet PC".
-
Input the user name for logging into the computer that executes the print job, and then click the OK button.
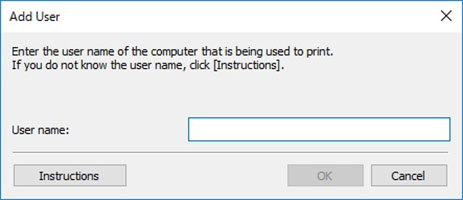
The User Information Settings dialog box appears.
Note- A message appears if you input a user name that has already been added and click the OK button. Click the OK button, and then input the user name again.
- Click the Instructions button to display "Confirming User Names."
- If multiple computers are logged in with the same user name, notification is done for each of their printing results.
While the User Information Settings dialog box is open, go to the procedure for "Registering Smartphones Using Canon PRINT Inkjet/SELPHY." Register a smartphone to the notification server.
Registering Smartphones Using Canon PRINT Inkjet/SELPHY
Use Canon PRINT Inkjet/SELPHY to register smartphones to the notification server.
The following provides explanations using the screens that appear when you use the Android operating system.
-
Download Canon PRINT Inkjet/SELPHY.
Download Canon PRINT Inkjet/SELPHY to the smartphone that you want to notify about print jobs finished/stopped and printer errors/warnings. For details about the method for downloading according to the OS in the smartphone you are using, see the following page.
 Important
- Download the latest version of Canon PRINT Inkjet/SELPHY to use it.
- To download, you need to register an account at the App Store or Google Play.
- You can download Canon PRINT Inkjet/SELPHY for free, but the transmission fees to connect to the App Store or Google Play are paid by the customer.
- Downloading is not possible if the OS environment you are using does not support Canon PRINT Inkjet/SELPHY. In addition, the download page may not appear.
-
Tap
 (Canon PRINT Inkjet/SELPHY).
Start Canon PRINT Inkjet/SELPHY.
Note- When you start up Canon PRINT Inkjet/SELPHY, if the printer setup screen appears, tap No.
-
Tap
 (
( for iOS) in the upper right of the screen.
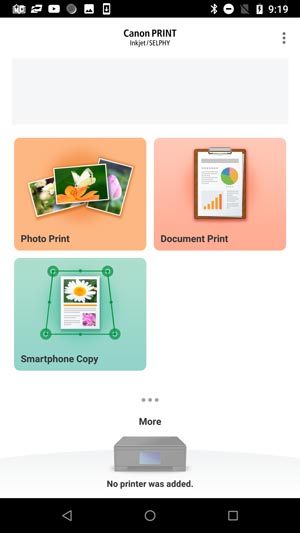
-
Tap Notification Settings.
-
Tap Scan.
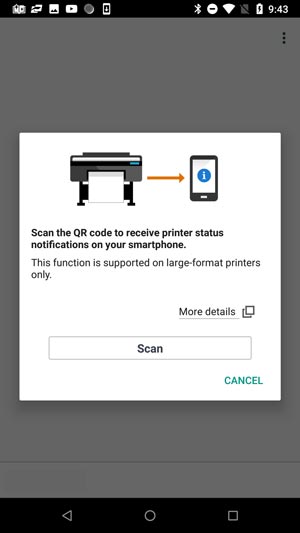 Note
Note- If a message appears requesting access to the camera from Canon PRINT Inkjet/SELPHY, tap OK and go to the next step.
The screen for scanning QR codes opens.
-
Scan the QR code.
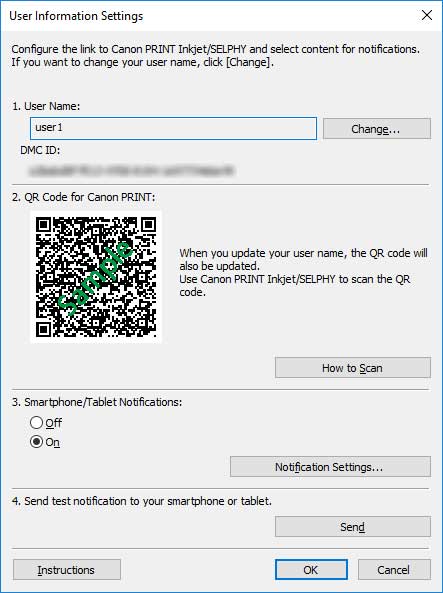
Scan the QR Code for Canon PRINT that is displayed on the User Information Settings dialog box on Device Management Console.
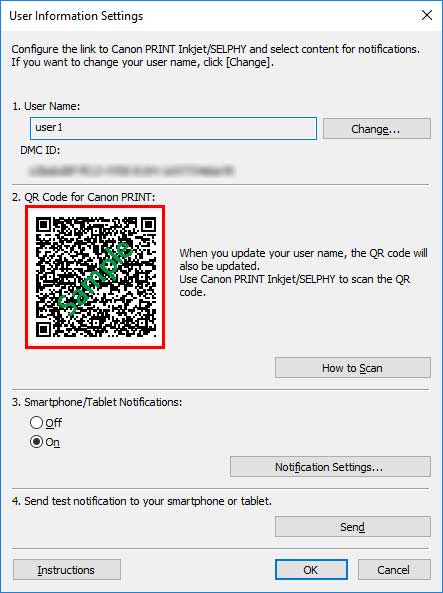 Note
Note- To change the user name, click Change. If you change the user name, the QR code is updated. Scan the QR Code for Canon PRINT again.
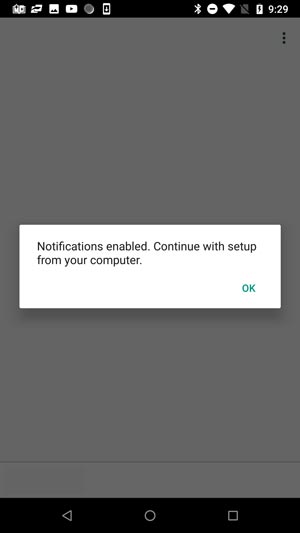
The following screen appears when you scan the QR Code for Canon PRINT.
-
Tap OK.
When the "Notifications enabled. Continue with setup from your computer." message appears, tap OK.
 Note
Note- If an error occurs in the smartphone registration, a message appears in Canon PRINT Inkjet/SELPHY. Do the operations according to the instructions in the message.
Next, go to the procedure for Setting Notifications to Additional Users by Using Device Management Console. Do the settings related to notifications to register a user to Device Management Console.
Setting Notifications to Additional Users by Using Device Management Console
Do the settings related to notifications in Device Management Console, and then register the user you added to Device Management Console.
-
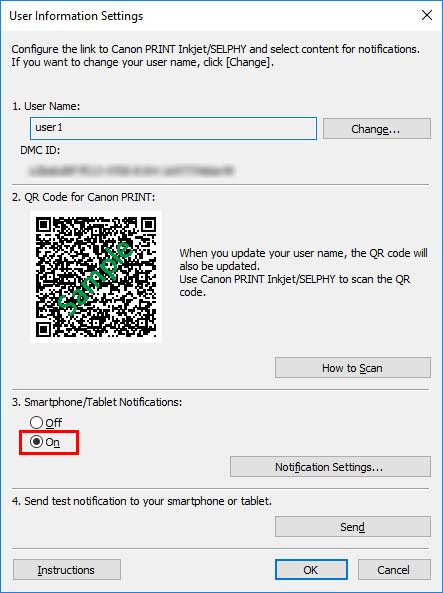
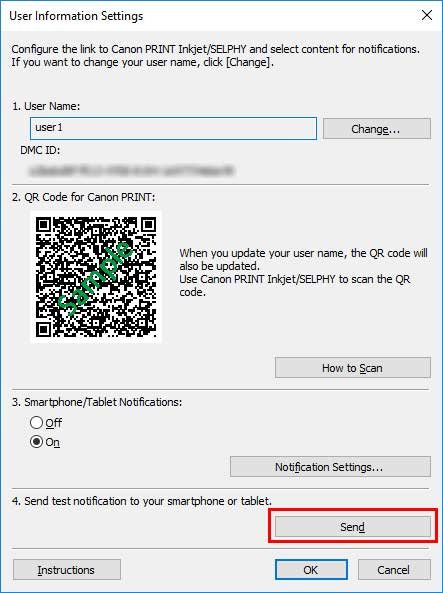
Select On in Smartphone/Tablet Notifications on the User Information Settings dialog box.
Note- For the procedure to display the User Information Settings dialog box, see "Adding Users to Device Management Console."
 Note
Note- The Notification Settings in Smartphone/Tablet Notifications, you can also set the Print Progress and the Errors/Warnings. For details about the setting items in Notification Settings Dialog Box, see "User Information Settings Dialog Box".
-
Click the Send button.
-
Click Yes button.
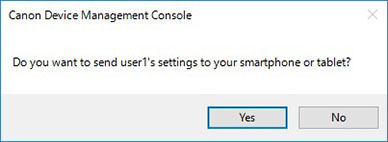
A notification is sent to the smartphone.
-
Confirm that the smartphone received the notification, and then click the OK button.
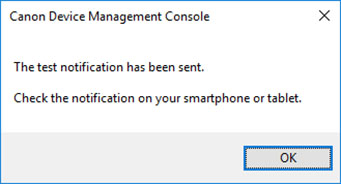
When the message that was sent in the test notification appears, confirm that "Notification Settings Were Turned On" on the smartphone, and then click the OK button.
Note- If notifying the smartphone fails, a message about the reason for the failure appears. Do the operations according to the instructions in the message.
The User Information Settings dialog box reappears.
-
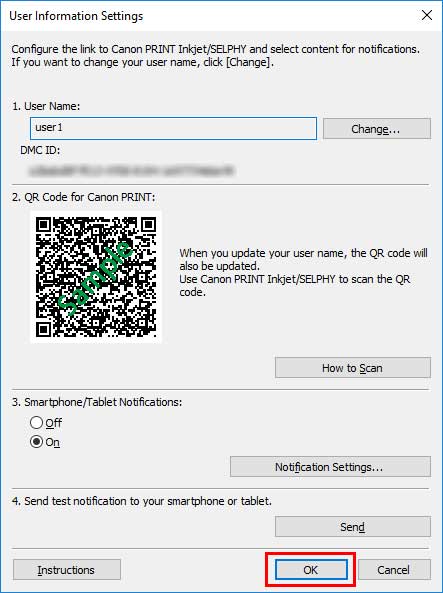
Click OK button.
 Important
- Be sure to click the OK button to complete the notification settings. The settings are not completed if you click the Cancel button or
 (Close) button to close the User Information Settings dialog box, and the smartphone is not notified about print jobs finishing or stopping.
The notification settings are complete. The smartphone is notified about print jobs that are finished or have stopped.
- Be sure to click the OK button to complete the notification settings. The settings are not completed if you click the Cancel button or
-
Confirm that the users you registered appear.
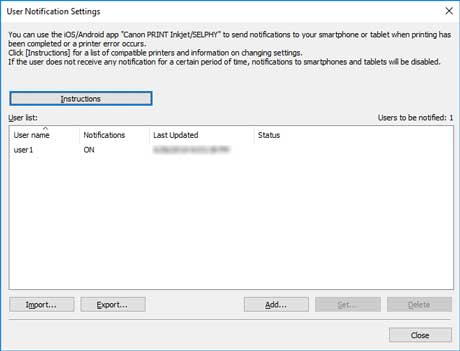
If the users you registered appear in User list, then adding the users is complete.
-
Select Check Operation Status on the Tools menu, and then click the Smartphone/Tablet Notifications tab.
The Smartphone/Tablet Notifications sheet on the Check Operation Status dialog box appears. You can confirm the results of the notifications that were sent to the smartphone.
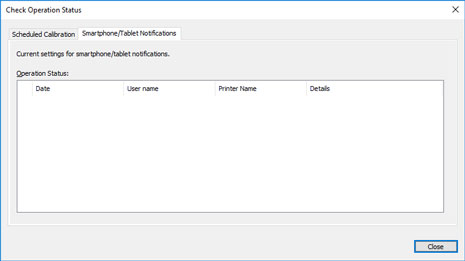
For details, see "Check Operation Status Dialog Box."
Confirming User Names
Confirm the user name of the computer that executes the print job and the user name that was added to Device Management Console.
![]() Important
Important
- To notify a smartphone about print jobs that have finished or have stopped, the user name of the computer that executes the print job and the user name that was added to Device Management Console must be the same.
Confirming the User Name of the Computer that Executes the Print Job
Execute the following procedure on the computer that is executing print jobs.
-
For Windows 10
From the Start menu, click Settings > Account > User information.
-
If you are logged in to a Microsoft account, a mail address will be displayed under User name.
-
If you are logged in to a local account, Local Account is displayed.
-
-
For Windows 8.1
From the Desktop charm, click Settings > Change PC settings > Account > Your account.
-
If you are logged in to a Microsoft account, the registered user name and mail address are displayed.
-
If you are logged in to a local account, Local Account is displayed.
-
-
For Windows 7
On the Start menu, click Control Panel > User Accounts, in this order.
-
For macOS/OS X
Open Users & Groups from System Preferences, and then right click Current User in the user list or click on Current User while pressing the control key and select Advanced Options.
The Account name in Advanced Options is the user name.
![]() Note
Note
- The login user name of the computer may not be the print job's owner's name if you are not using a printer driver, such as RIP (Raster Image Processor) or HP-GL/2.
If you want to receive notifications about print jobs like these, add a check mark to On completion of all print jobs (all users) in Print Progress in the Notification Settings in the User Information Settings dialog box.
- If you are logged in to a Microsoft account, part of your User name may be omitted from the print job owner's name.
- If you are logged in to a Microsoft account, from Control Panel, select Hardware and Sound > Devices and Printers. You can check the print job owner's name on the See what's printing list of current print jobs.
Confirming User Names Added to Device Management Console
Execute the following procedure on Device Management Console.
-
On the File menu, select Smartphone/Tablet Notifications > User Notification Settings.
The User Notification Settings dialog box appears.

The users you added appear in User list.
Starting the Resident Service
The resident service must be started to send notifications to smartphones. To start the resident service, use the following procedure.
![]() Note
Note
- If the resident service is already started, this operation is not needed.
-
Select Resident Service Settings in the Tools menu.
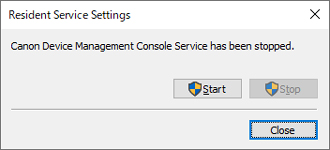
The Resident Service Settings dialog box appears.
-
Click Start button.
The resident service for Device Management Console starts up.
