
Replacing the Ink Tanks
When ink starts running low or has run out, a message is displayed prompting you to prepare a new ink tank or perform ink tank replacement. Prepare a new ink tank or perform ink tank replacement according to the displayed message (Checking Remaining Amounts and Usage of Consumables).
 |
|
For information on the product numbers for ink tanks, see Consumables.
You can check the current amount of ink remaining. Checking the Ink Level
|
When a Message Appear
<Please prepare a new tank.>
This message notifies you that ink is low. While you do not need to replace the ink tank now, make sure that you have a new ink tank for replacement at any time.

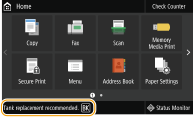
<Tank replacement recommended.>
Ink in the ink tanks has run out. Some ink remains in the machine, but printing is about to stop. Replacement is recommended before starting a large print job. Procedure for Replacing the Ink Tanks
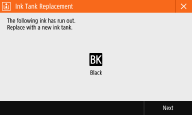
<Ink Tank Replacement>
The ink in the ink tanks and the machine has run out, and printing cannot be performed. Follow the instructions on the screen to replace the ink tanks. Procedure for Replacing the Ink Tanks
Procedure for Replacing the Ink Tanks
When you replace the ink tank, simple instructions on the replacement procedure are displayed on the screen. See the on-screen instructions as well as the following procedure.
1
Check the message.
 If <Tank replacement recommended.> is displayed
|
1
|
Select <Menu> in the Home screen. Home Screen
|
|
2
|
Select <Adjustment/Maintenance>
 <Maintenance> <Maintenance>  <Ink Tank Replacement>. <Ink Tank Replacement>. |
|
3
|
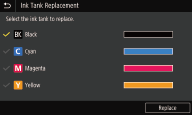
Select the ink color to replace, and select <Replace>.
 |
 If <Ink Tank Replacement> is displayed
|
1
|
Select <Next>.
|
2
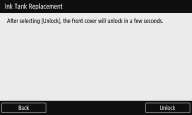
Select <Unlock>.
3
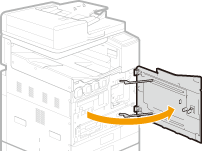
When <Open Front Cover> is displayed, open the front cover.
4
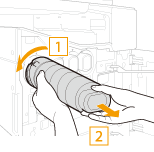
Pull out the ink tank.
Turn counterclockwise, then pull straight out.
5
Remove the new ink tank.

6
Install the new ink tank.
Before installing the ink tank, confirm that the color of the ink tank and the color indicated on the slot of the main unit are the same.
|
1
|
Align the
 mark on the main unit and the mark on the main unit and the  mark on the ink tank, and push the ink tank in until it stops. mark on the ink tank, and push the ink tank in until it stops.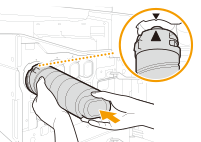 |
|
2
|
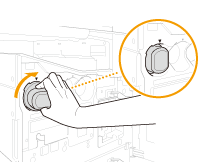
Turn clockwise until the ink tank clicks.
 |
7
Close the front cover.