
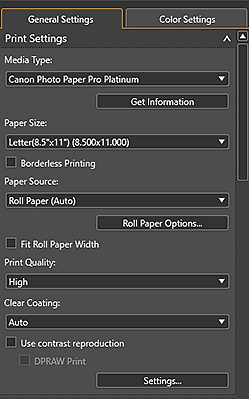
General Settings Tab (Print Settings)
Specify the paper to be used for printing, print quality, and other settings.
![]() Note
Note
- The displayed items vary depending on your printer, Layout Mode, and Paper Source.
- Media Type
-
Select the type of paper you want to use.
- Get Information
- Displays the Media Information on Printer dialog box for selecting the media type and roll paper width of the paper loaded in the printer.
- Paper Size
-
Select the size of the paper you want to use.
Click Specify Custom Size to display the Custom Paper Size dialog box for setting custom paper sizes.
 Note
Note- When you add paper in Specify Custom Size, the set paper name will be displayed in Paper Size.
- Roll Paper Width
-
Select the width of the roll paper you want to use.
Note- This is displayed only when Multiple Images (Auto Nesting) is selected for Layout Mode in the Stored Settings area.
- If the current roll paper width is not displayed, click Get Information, and then obtain the information from the printer.
- Borderless Printing
- Select this checkbox to print without borders.
- Paper Source
-
Select the paper source.
- Roll Paper Options...
- Displays the Roll Paper Options dialog box for setting the roll paper width and margins.
- Fit Roll Paper Width
- Select this checkbox to enlarge or reduce the slot to the roll paper width.
- Print Quality
-
Select the print quality from Highest, High, Standard, Fast, and Settings... according to the data to be printed.
Select Settings... to display the Print Quality dialog box for setting the print quality level in more detail. Move the slider to the right to improve the quality and left to increase the print speed.
 Important
- This function is unavailable when the Always print in the finest quality setting checkbox is selected in the Other Settings dialog box.
Note- Available print quality levels vary depending on your printer and media type.
- Settings... may not be displayed depending on your printer and media type.
- Clear Coating
-
Set Clear Coating. Perform Clear Coating to adjust glossiness by applying the Chroma Optimizer (CO) ink to the printed surface.
- Auto
-
Automatically sets the Clear Coating area and whether to perform Clear Coating.
This may help reduce consumption of the Chroma Optimizer (CO) ink and increase the print speed.
- Overall
-
Applies Clear Coating to the entire print area.
If the result of performing Clear Coating by selecting Auto is not satisfactory, selecting Overall may improve the situation.
- None
-
Prints without performing Clear Coating.
Compared to when Clear Coating is performed, the image quality may seem lower or the print surface may be more susceptible to scratches.
Note- If Clear Coating is unnecessary (for example, when laminating the printed image), select None.
Important- This function is unavailable depending on your printer and media type.
- None cannot be selected depending on your printer.
- Overall cannot be selected depending on the media type and print quality.
- When Overall is selected, changing the media type to one that does not support Overall changes the Clear Coating setting to Auto.
- Use contrast reproduction
-
Select this checkbox to reduce sharpness degradation that occurs when printing photos.
Important- This function is unavailable depending on the media type.
- For restrictions on use, see Using the Contrast Reproduction Function.
- DPRAW Print
-
Select this checkbox to print photos by optimally reducing sharpness degradation based on the depth data.
Important- Available when started from Digital Photo Professional V.4.9.20 or later and a DPRAW format image is selected.
- For restrictions on use, see Using the DPRAW Print Function.
Note- Available only when the Use contrast reproduction checkbox is selected.
- Settings...
- Displays the Contrast Reproduction / DPRAW Print dialog box for selecting whether to set Contrast Reproduction and DPRAW Print image by image.
