Edit Screen (Clipart)
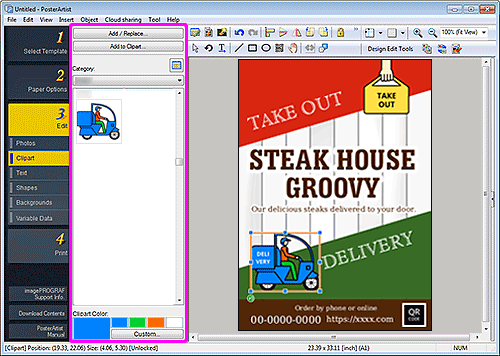
Add clipart to the poster or replace the added clipart.
To display the screen, click Edit in the task area, and then click Clipart.

- Add / Replace...
- Displays the Insert Image dialog box for adding or replacing clipart.
- Add to Clipart...
- Displays the Saving Artwork dialog box (Images) for adding clipart to the library.
- Convert to bitmap and edit...
-
Displays the Fill dialog box for filling specified areas with colors.
 Important
- If you edit clipart by clicking Convert to bitmap and edit..., you cannot change the color of the clipart with Clipart Color. To edit the color again, open the Fill dialog box and change the color.
- Category
- Select a clipart category from the list. The thumbnails of templates in the selected category appear.
 (View All Clipart)
- Displays the View All Clipart dialog box for viewing all clipart.
- Clipart Color
-
Displays the current clipart color and basic colors. To use other colors, click Custom..., and then select a color in the displayed dialog box.
- Regular color
- Displays the current color or basic colors in the four-color palette.
- Spot color
-
Displays available fluorescent colors in the four-color palette.
 Important
- Fluorescent spot colors cannot be used depending on your model or paper type.
- Fluorescent spot colors cannot be used when the Edit layout with Free Layout plus checkbox is selected in the Paper Options screen.
- Edit Palette...
-
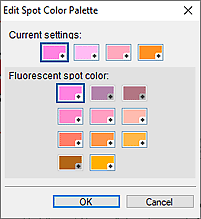
Click to display the Edit Spot Color Palette dialog box for editing the colors that appear in the palette.
- Edit Spot Color Palette dialog box
-

Select the four colors you want to display in the Spot color palette.
Select the color you want to edit in the palette under Current settings, and then select the color you want to display in the palette from Fluorescent spot color. Note
Note- The four colors that appear in the Spot color palette are retained on the printer.
