Registering Events
Register the event information to images so that you can browse the images by event.
-
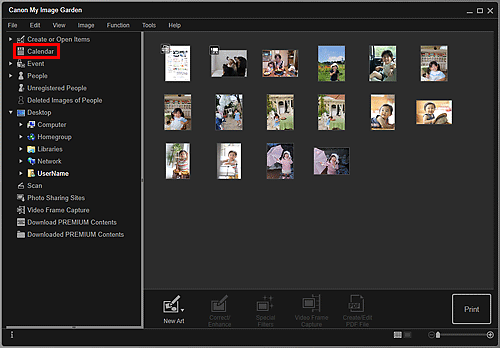
Click Calendar.

The view switches to Calendar.
 Note
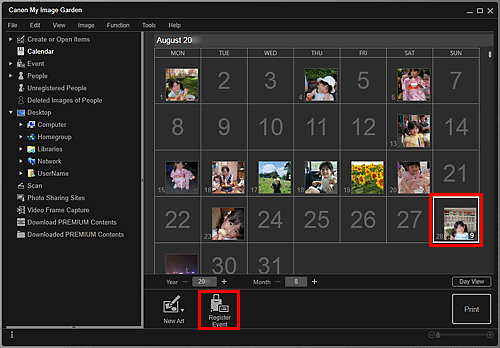
Note- Events can be registered only when the Calendar view is set to Month View. If set to Day View, click Month View at the bottom right of the screen to switch to Month View.
-
Select the date for which you want to register an event, then click Register Event.

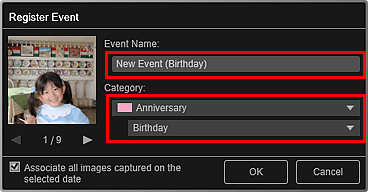
The Register Event dialog box appears.
 Note
Note- You can register up to four events to each date.
-
Set Event Name and Category.

 Note
Note- Refer to "Register Event/Edit Event Dialog Box" for the Register Event dialog box.
-
Click OK.
The event label appears in the Calendar view, and the registered event name appears below Event in Global Menu on the left side of the screen.
 Note
Note- When you place the cursor over either end of an event label, the shape of the cursor changes to
 (Left Right Arrow). In that state, you can drag the label to extend or shorten the event period.
 - To delete a registered event, right-click the event in the Event view and select Delete from the displayed menu.
- When you place the cursor over either end of an event label, the shape of the cursor changes to
 Important
- When the file name of an image is changed or an image is moved, the registered event information may be lost.
- Even if you copy images with event information registered, the registered event information will not be retained.
 Note
Note
-
You can edit the information of an existing event by one of the following operations.
- Select an event in the Event view, then click Edit Event
- Select an event label in the Calendar view set to Month View, then click Register Event

