


You can specify the print settings and start printing.
Click Print at the bottom right of each view to display the print settings dialog.
 Note
NoteThe displayed items vary by the data to be printed.
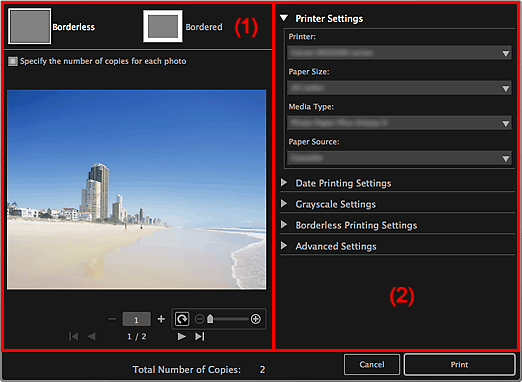
(2) Advanced Print Settings Area
You can check the print preview or set the number of copies to be printed.
 Borderless
You can print borderless photos.
 Note
NoteYou can specify the amount of extension in Borderless Printing Settings of the Advanced Print Settings area.
 Bordered
You can print bordered photos.
Specify the number of copies for each photo
Select this checkbox to set the number of copies to be printed image by image when printing multiple images at the same time.

 (First Page)/(Last Page)
Displays the first page or last page in print preview.

 (Previous Page)/(Next Page)
Switches pages in print preview.

 (Reduce 1 Copy)/(Increase 1 Copy)
You can set the number of copies to be printed. Set 1 to 99 as the number of copies.
 (Image editing tool)
This appears when you click an image; the image editing mode is activated.
 (Rotate 90°)
You can rotate the image 90 degrees clockwise each time you click it.
 (Reduce/Enlarge)
Click  (Reduce) or
  (Enlarge) to reduce or enlarge the print area. You can also freely change the print area by dragging the slider.
 Important
This function is not available in the following cases.
When printing an item or PDF file
When the Specify the number of copies for each photo checkbox is selected
 Note
NoteIn the image editing mode, you can also change the print area by dragging an image.
You can set the printer to be used or printing method. Click  (Right Arrow) for each item to display advanced setting items.
 Note
NoteThe displayed items vary by data and item to be printed.
Printer Settings
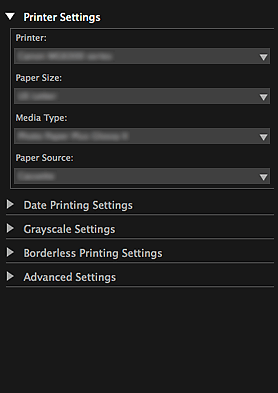
Printer
You can select the printer to be used.
 Note
NoteOnly Canon printers appear.
Paper Size
You can select the size of the paper to be used.
 Note
NoteWhen printing from the My Art edit screen, the paper size suitable for your item appears automatically. The size cannot be changed.
Refer to "Paper Size List" for sizes of paper.
Media Type
Select the type of paper to be used.
Paper Source
You can select how to feed paper.
 Note
NoteAvailable paper sizes, media types, and paper sources vary depending on the printer to be used.
Print Range Settings
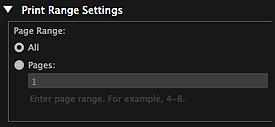
Page Range
You can specify the page range for printing.
All
You can print all pages.
Pages
You can print only the specified page by entering the page number of the page you want to print. To specify multiple pages, enter a hyphen between the page numbers; the pages in the specified range will be printed.
 Note
NotePrint Range Settings appears only when printing the items in My Art or PDF files.
Grayscale Settings

Print as grayscale photos
Select this checkbox to print images in grayscale.
Tone
You can adjust the color tone using the slider. Move the slider to the right for warm color tones (warm black) and left for cool color tones (cool black).
 Important
Cool and Warm may not be available depending on the selected Media Type.
 Note
NoteThis appears only when a printer that supports grayscale printing is selected in Printer Settings.
Date Printing Settings
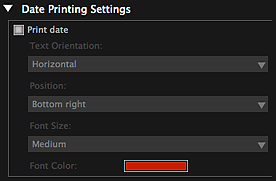
Print date
Select this checkbox to add dates to the images before printing.
Text Orientation
You can select the orientation of the date.
Position
You can select the position to print the date.
The print position of the date does not change even if images are rotated.
Font Size
You can select the size of the date.
Font Color
You can select the font color of the date.
 (Color Setting)
The Colors dialog appears. Select the color you want to set.
 Note
NoteThe date is the image shooting date recorded as Exif data. If there is no Exif data, the date and time of last update to the image file will be printed.
Borderless Printing Settings

Print on full page without borders
Select this checkbox to print the image on an entire sheet of paper without borders.
 Note
NoteYou can also set in Borderless of the Print Preview area.
Amount of Extension
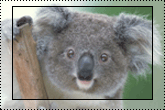
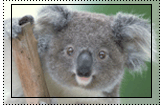
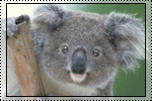
Select the amount of extension from None, Small, Medium, Large, and Standard.
 |
 |
 |
|
Large |
Medium |
Small |
The solid lines represent the paper size, and the translucent areas represent the amount of extension.
 Important
When Amount of Extension is set to Large, the back of paper may become stained.
When Amount of Extension is set to Small or None, margins may appear depending on the size of the paper.
Adjust Print Position
If the image on the printed sticker or disc label (CD/DVD/BD) is out of position, you can adjust the print position. You can adjust the print position in 0.01 inch or 0.1 mm increments within the following ranges.
Stickers: -0.08 inch (-2.0 mm) to +0.08 inch (+2.0 mm)
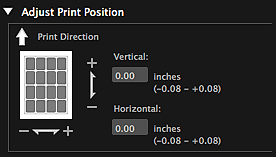
Disc Label (CD/DVD/BD): -0.2 inch (-5.0 mm) to +0.2 inch (+5.0 mm)
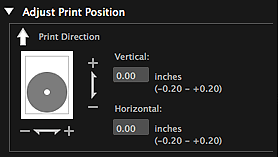
Vertical
You can adjust the print position in the vertical direction.
Set a positive value to move upward or set a negative value to move downward.
Horizontal
You can adjust the print position in the horizontal direction.
Set a positive value to move left or set a negative value to move right.
Advanced Settings
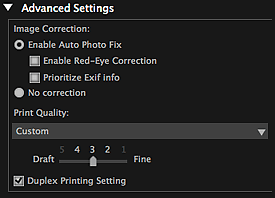
Image Correction
Select Enable Auto Photo Fix to apply corrections automatically; select No correction if you do not want to do so. Select Enable Auto Photo Fix to set the following.
Enable Red-Eye Correction
Select this checkbox to correct red eyes caused by a camera flash.
Prioritize Exif info
Select this checkbox to apply corrections primarily based on the settings made at the time of shooting.
 Important
The color tone may change when you print a document image with Enable Auto Photo Fix selected. In that case, select No correction.
Print Quality
You can select the print quality suitable for the data to be printed.
You can select High, Standard, Draft, or Custom. Select Custom to display a slider with which you can set the print quality.
 Note
NoteFast may appear in Print Quality depending on your model.
Duplex Printing Setting
This appears when you select a printer and media type that support duplex printing. Select this checkbox to print on both sides of the paper.
Starts printing with the specified settings.
 Printing Recommended Items and Images Displayed in Slide Shows
 Printing Disc Labels (CD/DVD/BD)
Page top |