

In the My Art edit screen, you can insert images into your items by dragging and dropping materials or by scanning items such as photos. You can also change the angle, position, and size of images. You can also correct or enhance images.
 Inserting Images from the Materials Area
 Important
This function may not be available when PREMIUM Contents are used.
 Note
NoteRefer to "My Art Edit Screen" for how to switch to the My Art edit screen.
Collage editing is used as an example in the following descriptions. The screen(s) may vary depending on what you create.
You can insert images in the Materials area into the layout frames of your item or replace images.
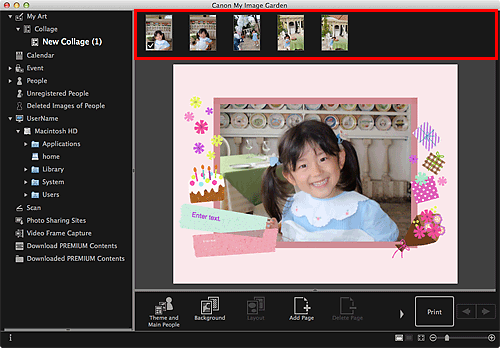
In the My Art edit screen, select an image in the Materials area.

 Note
NoteTo add an image to the Materials area, select the thumbnail in any view, then drag and drop it to the title in Global Menu.
Drag and drop it to a layout frame of your item.
When you move an image to a layout frame, a cross icon appears on the image.
You can scan and insert your favorite photos, etc. into your items. You can scan with simple steps or by using the scanner driver.
Place the item on the platen or ADF (Auto Document Feeder).
 Note
NoteRefer to "Placing Items (When Scanning from a Computer)" for your model from Home of the Online Manual for how to place items.
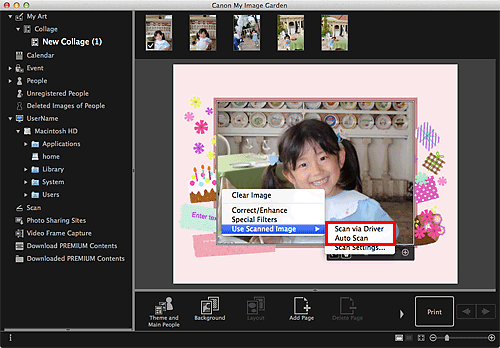
In the Edit area of the My Art edit screen, control-click an image, a layout frame, or the background, then select Use Scanned Image from the displayed menu.
 Note
NoteTo insert a scanned image into the background, place a checkmark beside Photo in the Select Background dialog.
From the Use Scanned Image menu, click Scan via Driver or Auto Scan.

When Scan via Driver is selected
The scanner driver screen appears. You can scan in the mode you want to use.
When Auto Scan is selected
Scanning starts. Items are detected automatically.
 Note
NoteTo specify the scan/save settings, click Scan Settings... from the Use Scanned Image menu. Refer to "Settings (Driver) Dialog" or "Settings (Auto Scan) Dialog" for your model from Home of the Online Manual for details.
Page top |