
Make sure that the power is turned on.
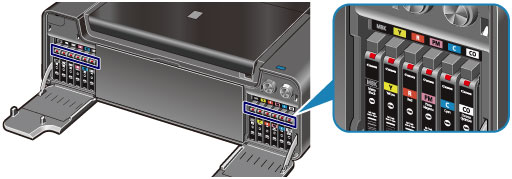
Press the tank cover open button to open the tank covers.
Check the ink lamp.
Close the left and right tank covers after checking the ink lamp status.
 The ink lamp is on.
The ink tank is correctly installed.
The ink lamp is flashing.
Flashing slowly (at around 3-second intervals)
 ...... Repeats
Ink tank is running low. Prepare a new ink tank.
 Note Note
|
Flashing fast (at around 1-second intervals)
 ...... Repeats
The ink has run out. If the ink lamp is flashing fast, there has been an error and the printer cannot print. Check the Alarm lamp on the printer.
The ink lamp is off.
The ink tank is not installed properly or the system cleaning function is disabled. If the ink tank is not installed properly, press the mark  (Push) to set the ink tank firmly into place.
If the ink lamp is still off after reinstalling the ink tank, there has been an error and the printer cannot print. Check the Alarm lamp on the printer.
|
Note
|
Page top |

