
Loading Sheets in the Printer
Follow these steps to load sheets in the printer.
![]() Important
Important
-
Remove any printed documents from the top delivery tray.
-
Paper that is wrinkled or warped may jam. If necessary, straighten the paper and reload it.
-
Load the paper straight. Loading paper askew will cause an error. (See "1317.")
![]() Note
Note
-
Before loading cut sheets, check whether or not the inside of the inner cover or the front output guide is soiled. If these areas are dirty, we recommend cleaning them in advance. (See "Cleaning Inside the Top Cover.")
-
Store unused paper in the original package, away from high temperature, humidity, and direct sunlight.
-
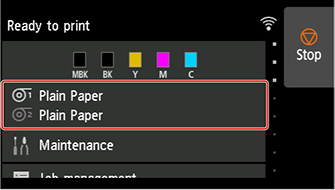
Select sheets as the paper source.
-
If a print job was received
Sheets are automatically selected, and the media type and size specified by the print job are shown on the touch screen.
Tap OK and Load paper.
-
If no print job was received
-
Tap paper settings display area on touch screen.
 Note
Note-
If the Home screen does not appear, tap the HOME button.
-
-
Tap
 area.
area. -
Tap Load paper or Replace paper.
-
Note-
If any paper has been advanced that will not be used, a message is shown requesting you to remove it.
Follow the instructions on the screen to remove the paper, and redo the operation.
-
-
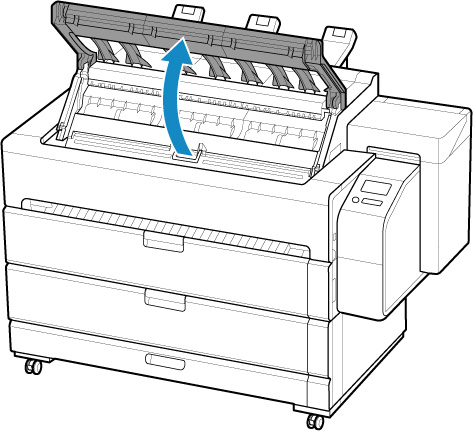
Open top cover.
-
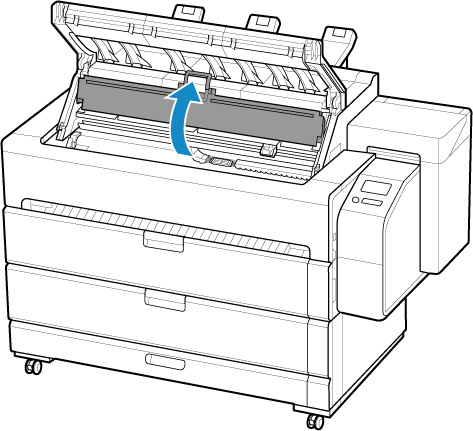
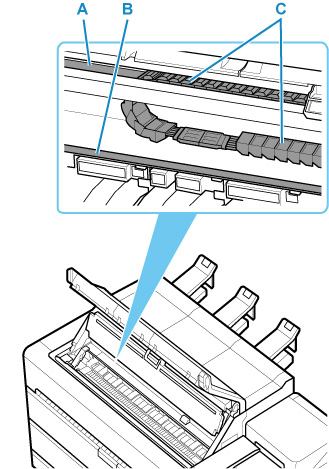
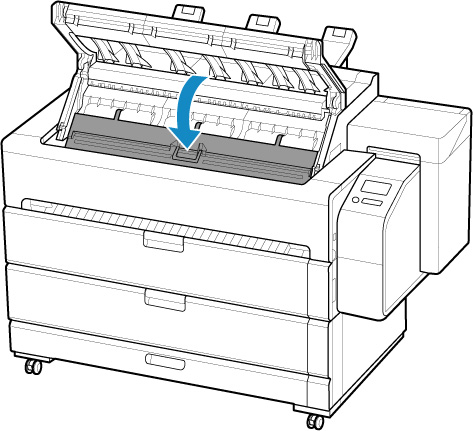
Open inner cover.
 Important
-
Do not touch Linear Scale (A), carriage shaft (B), or Ink Tube Stabilizer (C). Touching these parts may damage them.
-
-
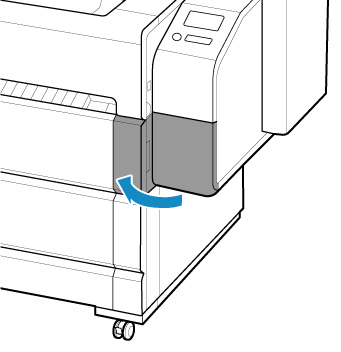
Open maintenance cover.
-
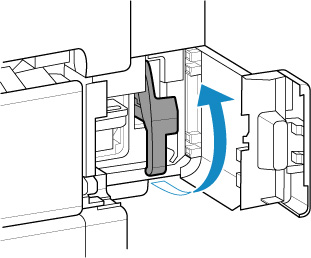
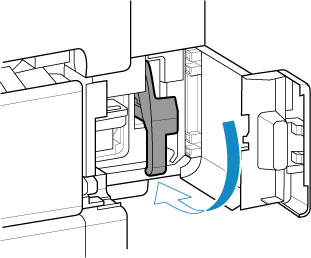
Lift release lever.
-
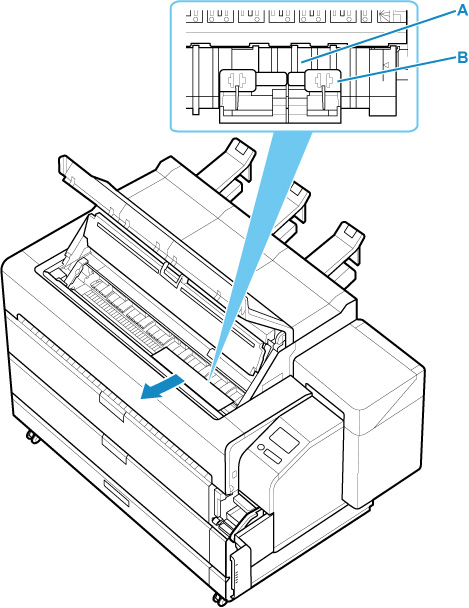
Place cut sheet with the print side up, insert the back edge of the cut sheet between the platen (A) and the paper retainer (B).
When you insert the sheet, it will adhere automatically to the surface of the platen.
Important-
Even if you insert a sheet between the platen and the paper retainer, it is not fixed to the printer. If you release the sheet, it may fall inside the printer. Do not release the sheet until you lower the release lever. If the sheet falls, go to the back of the printer and remove it.
-
Warped paper may rub against the print head. Straighten paper if it is warped before loading.
Note-
You can adjust the vacuum strength holding the paper against the platen when the release lever is up. If it is difficult to load the paper, tap Suction on the touch screen and adjust the vacuum strength. You can adjust the vacuum strength to 5 levels.
-
The suction remains on for about 30 seconds during loading. If you cannot finish loading a sheet during this time, pull the sheet away and reinsert it to start the suction again.
-
-
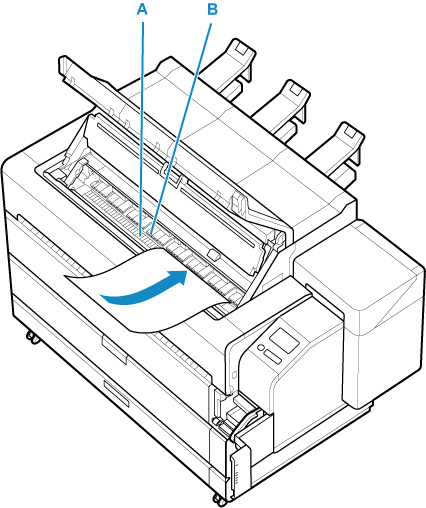
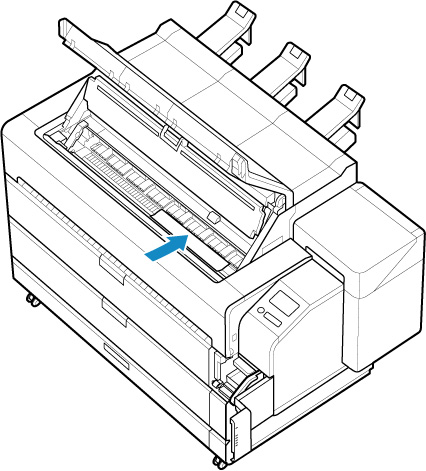
Feed a sheet between the platen and the paper retainer until the front edge of the sheet reaches the platen.
-
Insert the front edge of the fed sheet between the platen (A) and the roller (B).
-
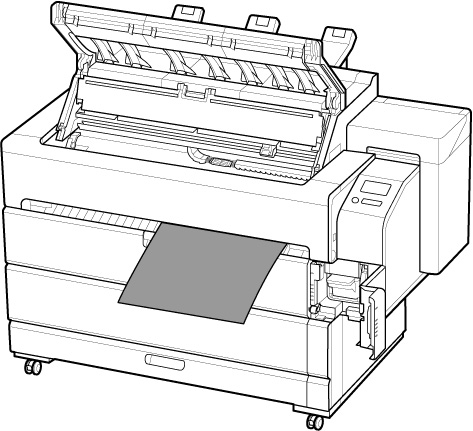
Send the inserted sheet to the front side and pull out the front edge of the sheet from the front output guide.
 Note
Note-
The sheet will hang down from the front output guide.
-
-
Adjust the position of the sheet while inserting it into the paper retainer.
-
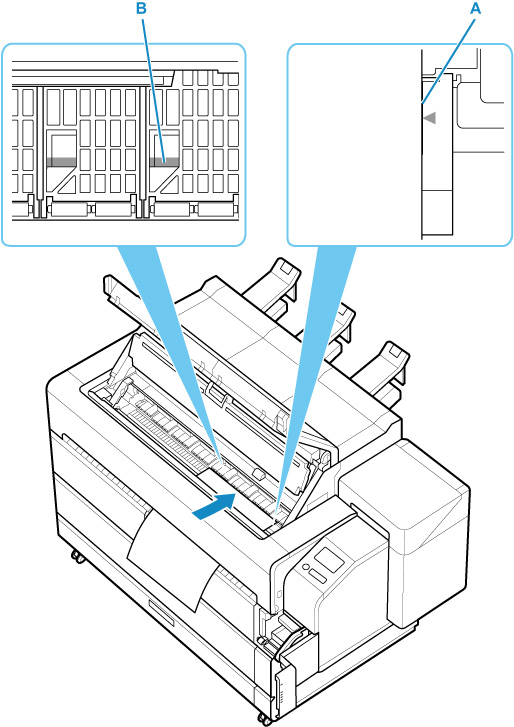
Align with right side paper alignment line (A).
-
Align far edge of inserted sheet with paper alignment line for paper retainer (B).
 Important
-
Load the sheet so that it is parallel to the right paper alignment line (A). Loading paper askew will cause an error.
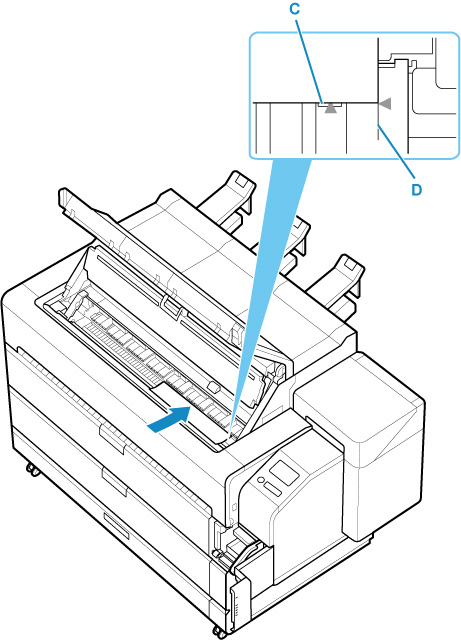
Note-
You can also align the cut sheet based on its near edge. In this case, load the cut sheet aligning its near edge with marks (C) on the platen and the right edge with the right-side paper alignment line (D).
-
Sheets are held in place by suction through holes on the platen. Although the suction may produce a noise when paper is loaded in some positions, it does not indicate a problem.
-
-
Lower release lever.
-
Close maintenance cover.
-
Close inner cover.
-
Close top cover.
-
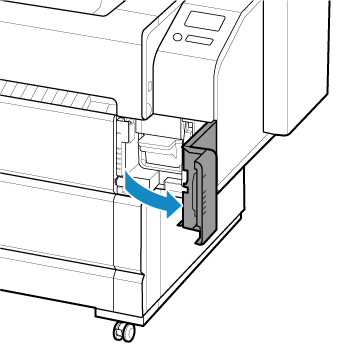
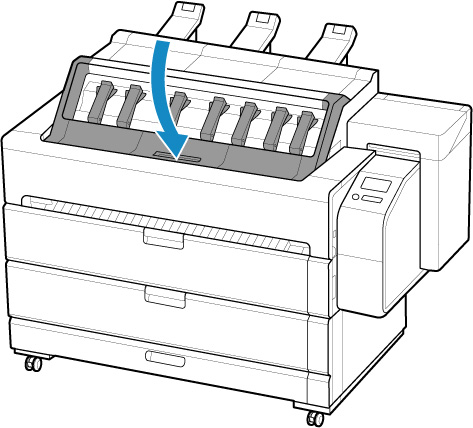
Attach the basket.
The printed sheet is ejected from the front of the printer. After loading the sheet, attach the basket before you start printing.
-
Check the touch screen display and tap OK.
-
If a print job was received
Tap OK to feed the paper and begin printing.
-
If no print job was received
Selecting the loaded media type from the menu. When you tap OK on the screen after selecting, printer starts feeding the paper.
Note-
For details on media types that you can select, see "Paper Information List."
-
It is recommended to store the basket after printing is finished.
-
