Adjusting Misaligned Seam Positions between Scanned Areas
The printer's scanner uses several alternatingly placed image sensors (scanner glasses) to scan a wide area. Each sensor therefore has a seam, and slight misalignment or blurriness can occur in an image where the seams are located.
-
If image misalignment occurs at the seams
-
If an image is blurry or image misalignment is noticeable at the seams
Correcting misalignment at seams
If misalignment occurs when copying or scanning, run Adjust Seam Position to correct the position at sensor seams.
| Original | Scan result (Misalignment in X direction) |
Scan result (Misalignment in Y direction) |
|---|---|---|
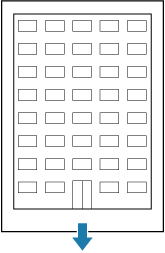 |
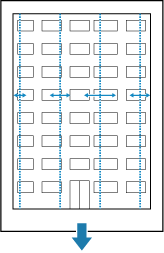 |
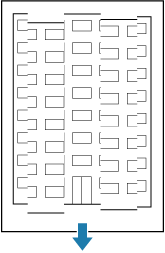 |
 Important
- If the original has uneven thickness, misalignment may remain even after running Adjust Seam Position.
- As the amount of correction, set the amount that remains from the value in the previous setting If you are not sure of the value set, select Initialize and return the setting to its default at time of shipment.
-
Scan the original, and check the dimensions of the scan result.
Measure the dimensions of the scan result using an image viewer on a PC, etc.
-
In the Home screen, select Menu.
-
Select Adjustment/Maintenance.
-
Select Adjust Scanner Image Quality.
-
Select Adjust Seam Position.
-
Select the direction for correcting position.
X corrects position in the width direction, and Y in the feed direction.
 Note
Note-
To clear the set correction value, select Initialize in this screen.
-
-
Select the scan resolution for correcting position.
Be sure to select the resolution when the misalignment was actually confirmed while scanning. Select a resolution from 200 dpi, 300 dpi, or 600 dpi.
-
Select the seam for correcting position.
Select the seam where misalignment occurred. The number of seams depends on your printer and the size of the original.
Important-
The TM-610M/TM-5610M have a maximum of 4 seams.
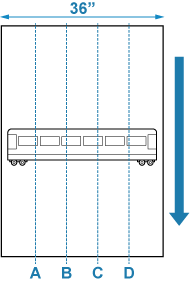
A: Seam 1 (position from left of image is approx. 7.5 in. (19 cm))
B: Seam 2 (approx. 14.3 in. (36 cm))
C: Seam 3 (approx. 22.1 in. (56 cm))
D: Seam 4 (approx. 29.2 in. (74 cm))
-
The TM-510M/TM-5510M have a maximum of 2 seams.
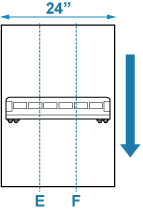
E: Seam 1 (position from left of image is approx. 7.9 in. (20 cm))
F: Seam 2 (approx. 15.8 in. (40 cm))
-
-
Set the correction value, and select Apply.
To set a value smaller than 0, first enter the value using the numeric keys, then select ± to change the sign.
-
Set the number for the correction value.
-
For correction value 1, misalignment is corrected by 1 pixel according to the level of resolution.
- 600 dpi : approx. 0.04 mm per pixel
- 300 dpi : approx. 0.08 mm per pixel
- 200 dpi : approx. 0.13 mm per pixel
-
-
Set the sign for the correction value.
-
Position correction in width direction X: If the image is shrunk along a seam, set the value to a smaller value. If it is stretched, set the value to a larger value.
Before correction After correction 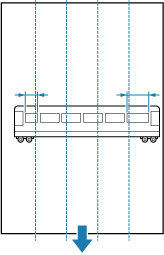
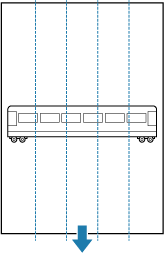
-
Position correction in width direction Y: If the image is shifted upward along a seam, set the value to a smaller value. If it is shifted downward, set the value to a larger value.
Before correction After correction 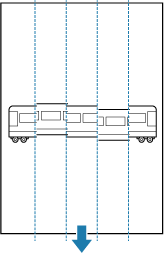
-
-
-
Select Apply.
After setting a correction amount, scan at the same resolution as when the misalignment occurred, and check the correction results.
Changing the seam mask setting
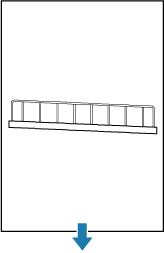
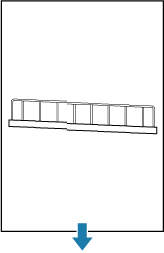
An image may be blurry or image misalignment may be noticeable at the seams when copying or scanning. Change the mask setting at the seam from Mask Seam.
| Original | Scan result |
|---|---|
 |
 |
-
In the Home screen, select Menu.
-
Select Adjustment/Maintenance.
-
Select Adjust Scanner Image Quality.
-
Select Mask Seam.
-
Select the setting.
- Auto
- The printer selects automatically whether to carry out masking according to the type of original loaded.
- Off
- Masking is not carried out. Select when an image is blurry.
- On
- Masking is carried out. Select when misalignment is noticeable.
