
Printing Files
You can print files by starting Direct Print & Share, or by creating a Shortcut Print icon, and dropping a file onto the icon.
If you print using the Shortcut Print icon, you can print files without displaying the Direct Print & Share screen.
You can print files by following the steps below.
Print Files by Starting Direct Print & Share
-
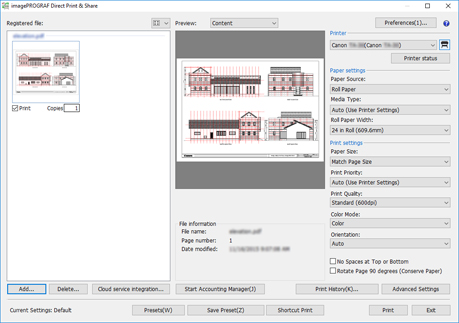
Add a check mark on Print for the files you want to print in the Registered file list on the main screen.
 Note
Note-
If the added files are displayed as a list, you can add check marks to all files by adding a check mark on the left side of Print. If you remove the check mark, the check marks for all files will be removed.
-
-
Enter the number of copies you want to print for each file.
-
Specify a printer in the Printer list, and configure print settings as needed.
-
Click Print.
Printing will start with the specified printer.
![]() Important
Important
-
If the document size is out of range of the size that can be configured in the custom size settings of the printer driver, that file or page cannot be previewed or printed. For more information, see Page Size in "Registered file List".
![]() Note
Note
-
Multiple files that are printed simultaneously will be printed under the same print settings.
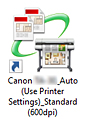
Print by Dropping a File on the Shortcut Print Icon
You must create a Shortcut Print icon beforehand. For instructions on how to create Shortcut Print icons, see "Create Shortcut Print Icons".
-
Drop a file on the Shortcut Print icon.
Printing status can be confirmed on the status monitor. If you want to stop printing while printing is in progress, stop the printing in the status monitor.
When using an Océ printer, you can check the print status or cancel printing from the Remote UI.Note-
If the status monitor is not automatically displayed, perform the following settings in the status monitor:
-
If the status monitor displays the Printer Status sheet:
Select Display Options from the Option menu, and in the Display Options dialog box that is displayed, add a check mark on Start when Printing is Started and select Display Pop-up Window.
-
If the status monitor does not display the Printer Status sheet:
Select Enable Status Monitor and Always Display Current Job in the Option menu.
-
-
If the status monitor is not automatically displayed even after performing these settings, display it from the start menu or task bar.
-
If you want to display the status monitor on the taskbar when you start Windows, perform the following settings in the status monitor:
-
Only if the status monitor displays the Printer Status sheet:
Select Display Options from the Option menu, and in the Display Options dialog box that is displayed, add a check mark on Start when Windows is Started and select Display Icon in Taskbar.
-
-
For detailed information, see the status monitor help.
Printing results are exported to the report file.
Report files are created in "\Canon\imagePROGRAF Direct Print & Share\Shortcut Print\Reports" of Documents or My Documents.
The report file name is "ipfdps_sp_report.txt".
If the report file exceeds 10 MB, one backup file of "ipfdps_sp_report_back.txt" will be created.
-
![]() Important
Important
-
Please do not move or delete the file you want to print until printing is complete.
![]() Note
Note
-
One copy will be printed.
-
Files other than PDF, TIFF, JPEG, and HP-GL/2 will not be printed.
-
If you drop a HP-GL/2 file on an icon for printing PDF, TIFF, or JPEG, Print Quality will be printed as Printer Default. If you drop a PDF, TIFF, or JPEG file on an icon for printing HP-GL/2, it will be printed under the initial settings of the printer driver set at the time the Shortcut Print icon was created.
-
If multiple files are selected, the order in which files are printed depends on the OS. If you want to print in a specific order, drop one file at a time.
-
If you select many files, you may encounter an error depending on the length limitations of the selected file names. If this happens, reduce the number of selected files, and then drop them.
Print by Dropping a File on the Start Icon with Print Settings Attached
You must create a Start icon with print settings attached beforehand. For instructions on how to create Start icons with print settings attached, see "Create Shortcut Print Icons".
-
Drop a file on the Start icon with print settings attached.
The main screen of Direct Print & Share will start.
-
Enter the number of copies you want to print for each file.
-
Specify a printer in the Printer list, and configure print settings as needed.
-
Click Print.
Printing will start with the specified printer.
