Troubleshooting -Standard setup-
Select an applicable item.
"Multiple wireless routers with the same name exist." Appears
This message appears when multiple wireless routers with the same name are found.
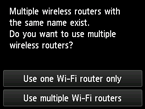
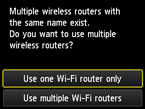
When you have only one wireless router
Select Use one Wi-Fi router only, then tap OK.
Select the MAC address of the target wireless router on the displayed screen.
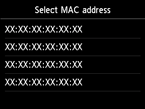
For details on checking the wireless router MAC address, see the wireless router manual or contact its manufacturer.
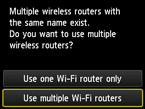
When using multiple wireless routers
Tap Use multiple Wi-Fi routers.
"The directly entered wireless router was not detected." is Displayed
- Is the network device (router, etc.) turned on? If it is already turned on, turn it off, and then turn it back on.
Do not proceed to the next screen of this guide until the power is turned on. The connection to the network device will be temporarily disabled.
Tap OK to confirm that the wireless router name/network name (SSID) is correct, and then tap OK again.
If the wireless router is still not detected
- Is the entered wireless router name/network name (SSID) correct?
- Are the device (such as a smartphone) and network device set up?
- Are the wireless router and printer installed in an open space where wireless communication is possible?
- Is the wireless router operating in IEEE802.11n (2.4 GHz), IEEE802.11g or IEEE802.11b?
Tap OK to confirm that the wireless router name/network name (SSID) is correct, and then tap OK again.
If the wireless router is still not detected
If SSID broadcast (e.g., "ANY" connection) is disabled or the stealth mode is enabled on the wireless router, enable SSID broadcast or disable the stealth mode, and then tap OK to search for the wireless router again.
When establishing a connection without changing the wireless router settings
Wireless connection settings for wireless router can be entered on printer directly.
If the wireless router is still not detected
If "WPA/WPA2 Enterprise" is set as the security protocol (encryption standard) on the wireless router, change the security protocol and redo the wireless connection settings. "WPA/WPA2 Enterprise" is not supported on this printer.
For details on changing the security protocol (encryption standard) used by the wireless router, see the wireless router manual or contact its manufacturer.
"Failed to connect to the wireless router." is Displayed when the Security Protocol is WPA/WPA2
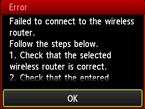
Make sure the passphrase entered for the wireless router is correct.
When there is no problem with passphrase
If the wireless router's DHCP function is off, turn it on and redo the wireless connection settings.
When the DHCP function is active
Tap OK.
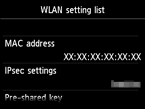
If MAC address filtering is enabled on the wireless router, change the settings to accept the printer's MAC address.
To check the printer's MAC address, follow these steps.
- Press the HOME button.
- Tap Setup.
- Tap Device settings.
-
Tap LAN settings > Confirm LAN settings > WLAN setting list to check MAC address.
When the MAC address filtering is disabled
If the wireless router is set to communicate using the IEEE802.11n standard only and encryption is set to TKIP, change either the encryption or communication standard and then redo the wireless connection settings.
If the encryption standard is set to TKIP, IEEE802.11n cannot be used as the communication standard.
For details on changing wireless router settings, see the wireless router manual or contact its manufacturer.
"Failed to connect to the wireless router." is Displayed when the Security Protocol is WEP

Make sure the WEP key entered for the wireless router is correct.
When using WEP key number 2, 3 or 4
Change the WEP key number set on the wireless router to 1, then set up a wireless connection again.
When establishing a connection without changing the wireless router settings
Select a WEP key number by entering wireless connection settings of the printer directly.
(Proceed to the guide for Advanced setup)
For details on changing the wireless router WEP key number, see the wireless router manual or contact its manufacturer.
When there is no problem with the WEP key and WEP key number
If the wireless router's DHCP function is off, turn it on and redo the wireless connection settings.
When the DHCP function is active
If you are using a wireless router that automatically creates WEP keys, check the WEP key (hexadecimal) created automatically by the wireless router, and then enter it on the printer.
For details on how to check the specifications of the wireless router, see the wireless router manual or contact its manufacturer.
When there is no problem with WEP key
If MAC address filtering is enabled on the wireless router, change the settings to accept the printer's MAC address.
To check the printer's MAC address, follow these steps.
- Press the HOME button.
- Tap Setup.
- Tap Device settings.
-
Tap LAN settings > Confirm LAN settings > WLAN setting list to check MAC address.

When the MAC address filtering is disabled on the wireless router, configure wireless connection settings again.
For details on changing wireless router settings, see the wireless router manual or contact its manufacturer.


