Scanning Documents and Photos
Scan items placed on the platen with settings suitable for documents or photos. In addition, scan with your favorite settings saved beforehand.
-
Place the item on the platen.
Place the item face-down on the platen and align an upper corner of the item with the corner at the arrow (alignment mark) of the platen.
-
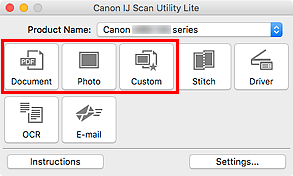
Click Settings..., then set the item type, resolution, etc. in the Settings dialog as required.
 Note
Note-
Refer to the following pages for details on the setting items in the Settings dialog.
- Once settings are made in the Settings dialog, the same settings can be used for scanning from the next time.
When setting is completed, click OK.
-
-
Click Document, Photo, or Custom.

Scanning starts.
 Note
Note
- To cancel the scan, click Cancel.
- Scanned images are saved in the folder set for Save in in the corresponding Settings dialog displayed by clicking Settings.... In each Settings dialog, you can also make advanced scan settings.

