Installing as a Print Server
This explains how to configure the share settings of and install the driver in order to use a computer connected to the device as a print server.
Prerequisites
When starting the computer, logon as a member of Administrators.
[Desktop] screen display (when using Windows 8.1/Server 2012 R2)
Procedures
1.
Start the installer → proceed according to the instructions on the screen.
2.
Select [Standard] or [Custom] for [Printer Setup] → click [Next].
If you have a network connection that does not use the TCP/IP protocol, select [Custom].
3.
If the [Select Process] screen is displayed, select [Add new printers] → click [Next].
4.
Select the device to install from [Printer List] → click [Next].
If you select [Standard] and configure shared settings, select [Configure printer information], then click [Next].
5.
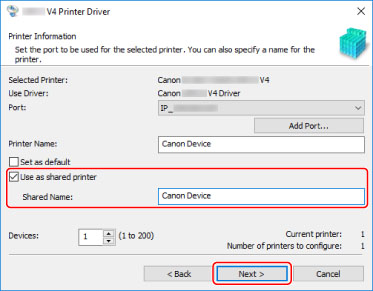
Select [Use as shared printer] → change [Shared Name] if necessary → click [Next].
If you select [Custom] and configure shared settings, set the port in [Port], then click [Next].

6.
Follow the instructions on the screen → click [Exit].