Printing by Arranging Freely
Arrange multiple images freely making use of the entire roll paper.
This is convenient when printing many images since they are automatically arranged apart from each other according to the roll paper width.
 Note
Note
- This function is available only for models supporting roll paper.
-
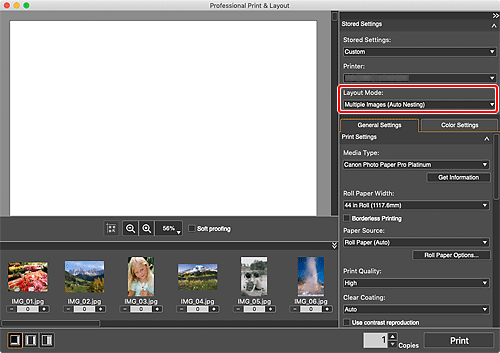
In the Stored Settings area, select Multiple Images (Auto Nesting) for Layout Mode.

 Important
- If you select Multiple Images (Auto Nesting) after placing images, the slot size returns to the default. The default can be set on the Layout tab of the Other Settings dialog .
-
In Print Settings on the General Settings tab, set Roll Paper Width.
 Note
Note- If the current roll paper width is not displayed, click Get Information, and then obtain the information from the printer.
-
Drag and drop the images you want to print to the Preview area.
The images are arranged automatically.
 Note
Note- If you click
 (Slot Auto Nesting) after manually changing the positions and sizes of images, the images will be arranged automatically according to their current positions and sizes.
- If you click
-
Click Print.
The Print dialog appears.
 Note
Note- The roll paper length required for printing is displayed in the Print dialog.
-
Click OK.

