
Adjusting Tone
When printing black and white photos, you can produce the cooling effects of cool colors and the warming effects of warm colors.
|
|
|
|
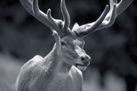
Cool Tone is selected |
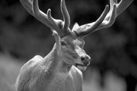
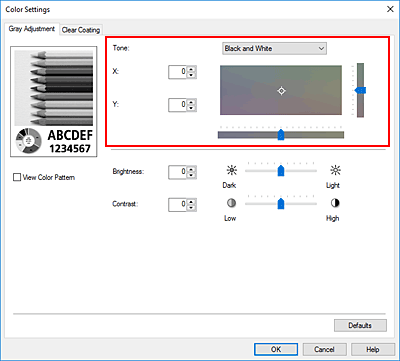
Black and White is selected |
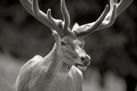
Warm Tone is selected |
The procedure for adjusting tone is as follows:
Open the printer driver setup window
Selecting Media Type from the Main tab.
For paper for which the black and white tone can be adjusted, select the paper you want to use from "Paper Information List" and check the information.
Select Advanced Settings
From the Main tab pull-down menu, select Advanced Settings.
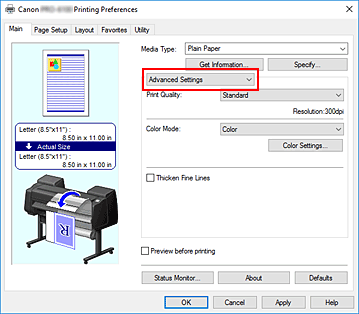
Select color mode
For Color Mode, select Monochrome (Photo), and then click Color Settings....
The Color Settings dialog box appears.Adjusting monochrome tones
From the Tone pull-down menu on the Gray Adjustment tab, specify any of the following items.
- Cool Tone
- This item adjusts color tones to cool shades of gray (cool black). When you select this item, a value of -30 is entered for X, and a value of 0 for Y.
- Black and White
- This item adjusts color tones to neutral shades of gray. When you select this item, a value of 0 is entered for X, and a value of 0 for Y.
- Warm Tone
- This item adjusts color tones to warm shades of gray (warm black). When you select this item, a value of 30 is entered for X, and a value of 0 for Y.
- Custom
-
You can adjust the color tones by using the horizontal and vertical sliders while checking the colors in the center adjustment area.
Adjust the horizontal and vertical sliders by dragging them to the left/right or up/down, respectively.
You can also adjust color tones by clicking or dragging the center adjustment area with the mouse.
You can also directly enter values that are linked to the sliders. When you enter values, set values in the range of -100 to 100 for X, and -50 to 50 for Y.
 Note
Note- Custom cannot be selected since it is displayed automatically when the adjustment value is directly entered.
- X, Y (Monochromatic adjustment value)
-
If necessary, you can adjust monochromatic colors manually.
To adjust the color tones, either enter values directly or click the up/down arrows.
You can also adjust the color tones by clicking or dragging the adjustment area with the mouse.
The value is also linked to the horizontal and vertical sliders.
When you enter values, set values in the range of -100 to 100 for X, and -50 to 50 for Y.
The selected value will be shown in the preview on the left side.
After adjusting the tones, click OK.
Complete the setup
Click OK on the Main tab.
When you execute print, the color document is converted to grayscale data with adjusted tones. It allows you to print the color document in monochrome.
