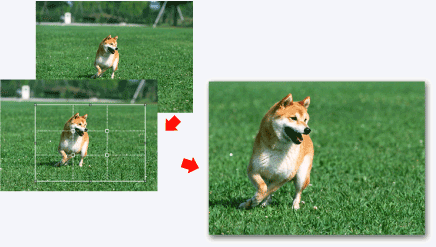


Cropping is the act of selecting the area you want to keep in an image and discarding the rest.
Select the image you want to crop, then click  (Crop) in the Tools area to display the Crop window.
Drag the white squares on the image to adjust the area to be cropped, then click OK.
 Note
NoteFor bordered layouts, a white frame appears when you drag the area you want to crop.
To move the cropping area, place the cursor within the white frame and drag it. You can enlarge or reduce the cropping area by dragging the white frame.
Select the Display lines for the rule of thirds checkbox to display the guideline. Place an intersection of the guideline over the main subject such as a person or building to create a balanced image.

When cropping is performed, it applies only to the print result; the original image will not be affected. The original image will not be cut off.
For cropped images, the  (Crop) mark appears on the upper left of the thumbnails.
See "Crop Window" for details on the Crop window.
Page top |