
Aligning Objects
Align multiple objects on the poster.
Align objects relative to their positions or with the guide or grid.
-
Select multiple objects.
The selected objects are framed in orange.
 Note
Note- For how to select multiple objects, see Selecting Objects.
-
On the toolbar, click
 (Align and Distribute Objects Dialog).
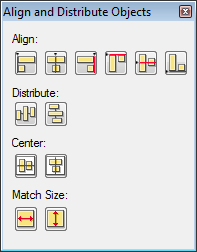
The Align and Distribute Objects dialog box appears.
 Note
Note- The Align and Distribute Objects dialog box can also be displayed when you right-click any of the selected objects, and then select Align and Distribute Objects > Align and Distribute Objects Dialog.... For details, see Align and Distribute Objects Dialog Box.
-
From the Align, Distribute, and Center buttons, click the one you want to apply.
The objects are aligned accordingly.
Note- The objects are aligned based on their orange frames. For images with margins, trim the margins beforehand to align the depicted images. For details, see Trimming Photos.
-
When finished aligning, click
 (Close).
Using the Guide
-
On the toolbar, click
 (Guide).
The guide appears on the poster.
Note- The guide can also be displayed when you right-click outside the poster, and then select Grid and Guide > Guide.
-
Drag the guide to the position where you want to adjust an object.
-
On the toolbar, click
 (Down Arrow) to the right of (Guide), and then select to place a checkmark beside Snap to Guide.Note
- Alternatively, right-click outside the poster, select Grid and Guide, and then select to place a checkmark beside Snap to Guide.
-
Drag the object to the position where you want to adjust it.
The object is snapped to the guide when brought closer to it.
Note- If you prefer not to snap the object to the guide, on the toolbar, click (Down Arrow) to the right of (Guide), and then select to remove the checkmark beside Snap to Guide.
- If you press the Alt key when bringing the object closer to the guide, the Snap to Guide setting will be switched while holding down the Alt key.
- To specify the guide position numerically, on the toolbar, click (Down Arrow) to the right of (Guide), and then select Enter Guide Position... to display the Guide Position. For details, see Guide Position Dialog Box.
- The ruler can be displayed at the top edge and left edge of the poster design area. To display the ruler, select Ruler from the View menu.
- If you prefer not to snap the object to the guide, on the toolbar, click
Using the Grid
-
On the toolbar, click
 (Grid).
The grid appears on the poster.
Note- The grid can also be displayed when you right-click outside the poster, and then select Grid and Guide > Grid.
-
On the toolbar, click
(Down Arrow) to the right of (Grid), and then select to place a checkmark beside Snap to Grid.Note- Alternatively, right-click outside the poster, select Grid and Guide, and then select to place a checkmark beside Snap to Grid.
-
Drag the object to the position where you want to adjust it.
The object is snapped to the grid when brought closer to it.
Note- If you prefer not to snap the object to the grid, on the toolbar, click (Down Arrow) to the right of (Grid), and then select to remove the checkmark beside Snap to Grid.
- If you press the Alt key when bringing the object closer to the grid, the Snap to Grid setting will be switched while holding down the Alt key.
- If you prefer not to snap the object to the grid, on the toolbar, click
