Creating and Printing Enlarged Copies of Photos and Documents
Use PosterArtist QuickCopy to print posters by enlarging scanned photos and documents. Scanned items can also be inserted as objects in posters.
 Important
- The scanner's calibration function cannot be used.
 Note
Note
- PosterArtist QuickCopy is installed automatically when PosterArtist is installed.
- Access our website for information on scanners and All-In-One printers supporting PosterArtist QuickCopy.
- For details on PosterArtist QuickCopy, see PosterArtist QuickCopy Screen.
- If you plan to edit the scanned item, using a TWAIN device will allow you to make more detailed settings for importing images than with PosterArtist QuickCopy.
-
Connect computer and scanner.
-
Double-click
 PosterArtist QuickCopy on the desktop.
 Note
Note-
You can also start PosterArtist QuickCopy in the following ways.
Windows 10:
From the Start menu, select (All apps >) Canon Utilities > PosterArtist QuickCopy.
Windows 8.1:
Select PosterArtist QuickCopy on the Start screen to start PosterArtist QuickCopy.
If PosterArtist QuickCopy is not displayed on the Start screen, select the Search charm, and then search for "PosterArtist QuickCopy."
Windows 7:
From the Start menu, select All Programs > Canon PosterArtist > PosterArtist QuickCopy.
-
-
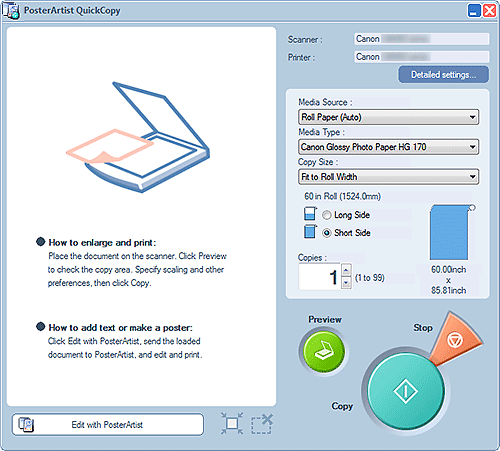
Click Detailed settings..., and then in the displayed screen, specify the scanner and printer to use.
 Note
Note- Images can be retouched as needed when scanning them. For details, see Detailed settings... in PosterArtist QuickCopy Screen.
-
Specify Media Source, Media Type, Copies, and other settings.
 Note
Note- The displayed paper types vary depending on the selected printer.
-
For borderless printing, specify the settings as follows.
Media Source: Roll Paper
Media Type: Paper that supports borderless printing
Copy Size: Fit to Roll Width
Long Side and Short Side: Select either checkbox
-
Place the original.
-
Click Preview.
The image appears in the preview area. The scan area is indicated by a dashed outline.
Change the scan area as needed. Note
Note- Preview can be skipped.
-
Click Copy.
Scanning starts. When scanning is completed, printing starts automatically.
 Note
Note- To cancel printing, click Stop, and then click Cancel in the displayed screen.
 Note
Note
- To send scanned images to PosterArtist, click Edit with PosterArtist. Sent images appear in the poster design area of PosterArtist. For instructions on creating posters, see Creating and Printing Posters.

