| Editing Backgrounds |
In PosterArtist, a single image in the background library can be set as the background.
This section describes how to add an image in the background library to the poster.
1. Select Backgrounds in the Edit task.
The Backgrounds settings panel is displayed.
2. In Category, select a background category.
Thumbnails of backgrounds in the selected category appear.
3. Select a background and double-click it.
The selected background is placed.
1. Select Backgrounds in the Edit task.
The Backgrounds settings panel is displayed.
2. In Category, select No Background.
3. Select a blank thumbnail and double-click it.
The background is removed.
1. Select Backgrounds in the Edit task.
The Backgrounds settings panel is displayed.
2. In Background Color, the current background color and basic colors are displayed. To use one of the basic colors, click the corresponding button. To use other colors, click Custom and select a color from the Color dialog box.
|
|
In PosterArtist, the background can be set by filling the poster with an image, instead of selecting a background from the Backgrounds settings panel.
This section describes how to set an image on the poster as the background.
1. Right-click an image on the poster and select Fit to background (Background setting).
The image size and trimming data is updated, and the image is moved to the very back to cover the entire poster area.
|
- Images in the photo library - Images you have added to the poster - Images copied and pasted from other applications
|
Margins can be specified for the background.
1. Select Backgrounds in the Edit task.
The Backgrounds settings panel is displayed.
2. Click Set Margins.
The Background Margins dialog box is displayed.
3. Specify the margin width in Top, Bottom, Left, and Right. Enter the value directly or click ![]() or
or ![]() at right to increase or decrease the value.
at right to increase or decrease the value.
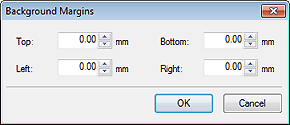
4. Click OK.
Margins are set in the background.
