Changing Settings in Direct Connection
 Note
Note
-
This function is not available depending on the printer you are using.
-
Depending on the printer you are using, "Direct connection" may be referred to as "Access point mode" in the manuals.
-
You can use this function only when you are using a computer compatible with the wireless LAN.
-
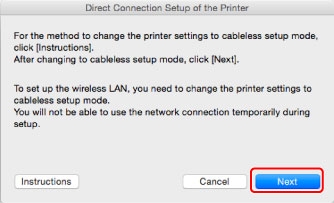
Select Set up printer's direct connection... on Settings menu.
The Direct Connection Setup of the Printer screen is displayed.
-
Check displayed message and click Next.

If the screen asking you to enter the password is displayed, enter the password specified for your computer and click Install Helper.
-
Click Allow on displayed screen.
The Select Printer screen is displayed.
 Note
Note-
If only one printer is available for changing the settings, the Direct Connection Setup of the Printer screen is displayed. In this case, go to step 6.
-
-
Select printer from Select Printer screen and click OK.
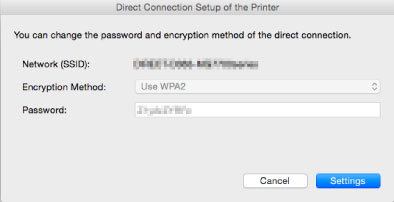
The specified SSID (access point name), encryption method, and password are displayed on the Select Printer screen.
-
Change encryption method or password as necessary.

 Important
-
You cannot change the encryption method or password depending on the printer you are using.
-
If you cannot change the settings from the screen above, you can update the SSID (access point name) and password at the same time using the operation panel (You cannot change the encryption method.).
For details, search for "UG500"/"UG501" on your printer's Online Manual and see the instructions shown.
-
-
Click Settings.
The setting information is sent to the printer.

