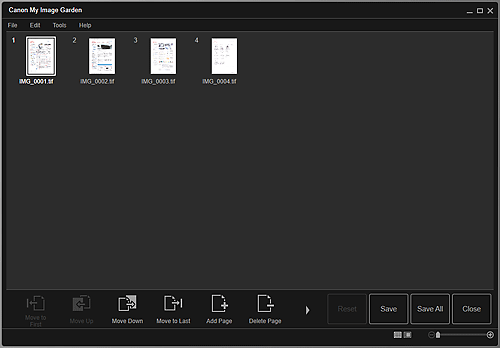
Creating/Editing PDF Files
You can create PDF files from images saved on a computer. You can also add pages to or delete pages from the created PDF files and rearrange pages.
 Important
- You can create or edit up to 99 pages of a PDF file at one time.
- For PDF files, only those created in My Image Garden or IJ Scan Utility are supported. PDF files created or edited in other applications are not supported.
 Note
Note
- File formats that can be selected are PDF, JPEG, TIFF, and PNG.
-
When a password-protected PDF file is selected, you need to enter the password.
-
 Important
- You cannot use images whose number of pixels in the vertical or horizontal direction is 10501 or more.
-
Click Create/Edit PDF File at the bottom of the screen.
The view switches to Create/Edit PDF File.

-
Add or delete pages as required.
When adding existing images or PDF files:
Click Add Page at the bottom of the screen. After the Open dialog box appears, select the image(s) or PDF file(s) you want to add, then click Open.
When deleting pages:
Select the image(s), then click Delete Page at the bottom of the screen.
-
Change the page order as required.
You can change the page order by clicking a page then using Move to First, Move Up, Move Down, or Move to Last at the bottom left of the screen.
You can also change the page order by dragging and dropping a page to the target location.
-
Click Save or Save All.
When saving only the selected page(s):
Click Save to display the Save dialog box.
When saving all pages:
Click Save All to display the Save dialog box.
-
Specify the save settings.
 Important
-
If a password-protected PDF file is edited, the passwords will be deleted. Reset the passwords in the Save dialog box.
-
-
Click Save.
The PDF file(s) is (are) saved, and the Create/Edit PDF File view reappears.
-
Click Close.
The Create/Edit PDF File view closes.
The
 (PDF) mark appears on the upper left of the thumbnails of saved PDF files.

