Adjusting Images
You can make fine adjustments to the overall brightness, contrast, etc. of images.

-
Select the image(s) you want to adjust.
-
Click Correct/Enhance at the bottom of the screen.
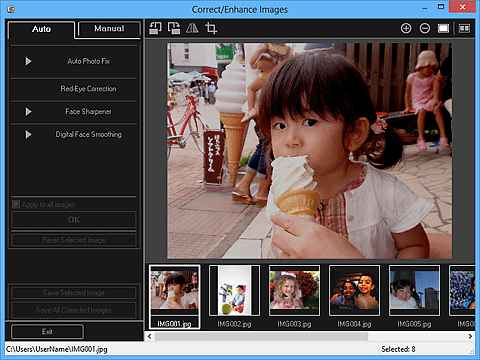
The Correct/Enhance Images window appears.

-
Select the image you want to adjust from the Selected Images area.
The selected image appears in the Preview area.
 Note
Note- If only one image is selected, only the preview appears and the Selected Images area does not appear.
-
Click Manual, then click Adjust.
-
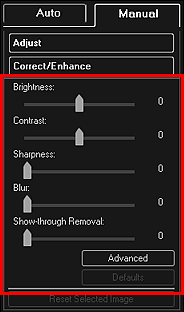
Move the slider of each item to adjust the level.
The following adjustments are available:
Brightness
Contrast
Sharpness
Blur
Show-through Removal

The image is adjusted and the
 (Correction/Enhancement) mark appears on the upper left of the image.
 Note
Note- Click
 (Display Comparison Screen) to display the images before and after the adjustment side by side in a separate window so that you can compare and check the result.
 - Click Advanced to make fine adjustments to the image brightness and color tone. Refer to Advanced in "Correct/Enhance Images Window" for details.
- Click Defaults to undo all adjustments.
- Click
-
Click Save Selected Image or Save All Corrected Images.
Adjusted image(s) is (are) saved as a new file(s).
 Note
Note- To save only the image(s) you like, select it (them) and click Save Selected Image. Click Save All Corrected Images to save all the adjusted images at one time.
- The adjusted image(s) can be saved in JPEG/Exif format only.
-
Click Exit.
 Important
- If the adjusted image(s) is (are) not saved, the adjustment(s) will be deleted.

