

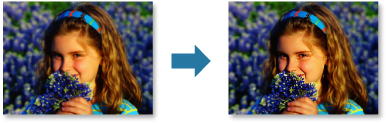
You can sharpen out-of-focus faces.
There are two Face Sharpener methods: automatic and manual.
Select the image(s) you want to correct.
Click Correct/Enhance at the bottom of the screen.
The Correct/Enhance Images window appears.
Select the image you want to correct from the Selected Images area.
The selected image appears in the Preview area.
 Note
NoteIf only one image is selected, only the preview appears and the Selected Images area does not appear.
Make sure that Auto is selected.
Click Face Sharpener.
 Note
NoteThe correction level can be changed by moving the slider displayed below Face Sharpener.
Click OK.
The face is sharpened and the  (Correction/Enhancement) mark appears on the upper left of the image.
NoteClick  (Display Comparison Screen) to display the images before and after the correction side by side in a separate window so that you can compare and check the result.
Click Reset Selected Image to undo all corrections.
Select the Apply to all images checkbox to correct the images displayed in the Selected Images area at one time.
Click Manual, then click Correct/Enhance.
Click Face Sharpener.
 Note
NoteThe correction level can be changed by moving the slider displayed below Face Sharpener.
When the cursor is moved over the image, the shape of the cursor changes to  (Cross).
Drag to specify the area you want to correct, then click OK that appears over the image.
The face area in and around the specified area is sharpened and the (Correction/Enhancement) mark appears on the upper left of the image.
NoteYou can also drag to rotate the specified area.
Click (Display Comparison Screen) to display the images before and after the correction side by side in a separate window so that you can compare and check the result.
Click Undo to undo the last operation.
Click Save Selected Image or Save All Corrected Images.
Corrected image(s) is (are) saved as a new file(s).
NoteTo save only the image(s) you like, select it (them) and click Save Selected Image. Click Save All Corrected Images to save all the corrected images at one time.
The corrected image(s) can be saved in JPEG/Exif format only.
Click Exit.
 Important
If the corrected image(s) is (are) not saved, the correction(s) will be deleted.
Page top |

