

When remaining ink cautions or errors occur, the ink lamps and the Alarm lamp will flash orange to inform you of the error. Count the number of flashes and take appropriate action.
 Note Note
|
When you need to replace a FINE cartridge, follow the procedure below.
 Important ImportantHandling FINE cartridge
Furthermore, with such a FINE cartridge, the machine will not be able to inform you when to replace the FINE cartridge properly.
|
 Note Note
Even when printing with one ink only, print with leaving the empty FINE cartridge installed. If either of the color FINE cartridge or black FINE cartridge is not installed, an error occurs and the machine cannot print. For information on how to configure this setting, see Setting the Ink Cartridge to be Used.
Both color ink and black ink are also consumed in the standard cleaning and deep cleaning of the print head, which may be necessary to maintain the performance of the machine. When ink runs out, replace the FINE cartridge immediately with a new one. |
Make sure that the power is turned on.
Retract the paper output tray and the output tray extension.
Open the cover.
The FINE cartridge holder moves to the replacement position.

 Caution Caution
|
 Important Important
For details on the cleaning, refer to Safety and Important Information.
|
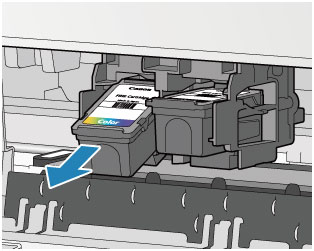
Remove the empty FINE cartridge.
(1) Push down the FINE cartridge until it clicks.
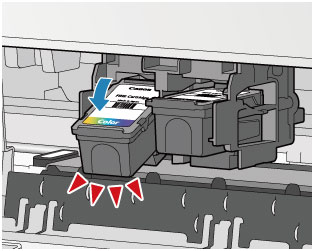
(2) Remove the FINE cartridge.
 Important Important
|
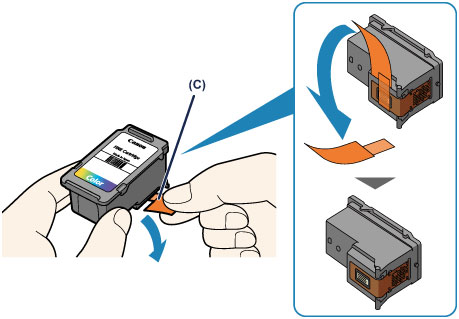
Prepare a new FINE cartridge.
(1) Take a new FINE cartridge out of its package and remove the protective tape (C) gently.
 Important Important
|
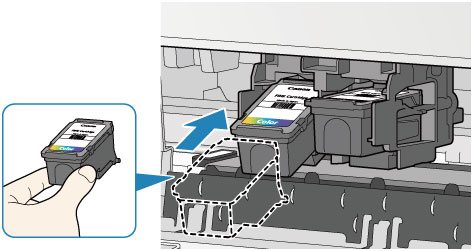
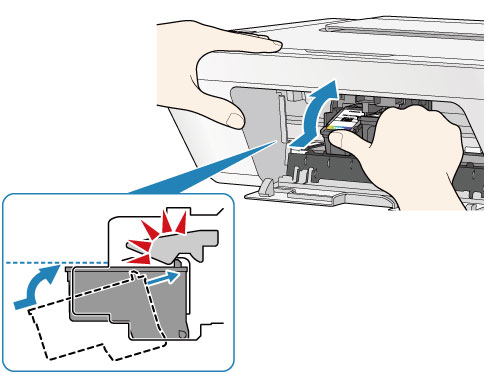
Install the FINE cartridge.
(1) Insert the new FINE cartridge at a slant into the FINE cartridge holder.
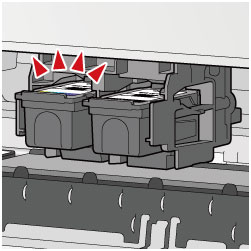
The color FINE cartridge should be installed into the left slot and the black FINE cartridge should be installed into the right slot.
 Important Important
|
(2) Push the FINE cartridge in and up firmly until it snaps into place.

 Important Important
|
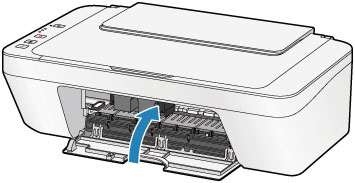
Close the cover.
 Note Note
|
Adjust the print head position.
After replacing the FINE cartridge, perform the print head alignment.
 Note Note
|
Page top |