
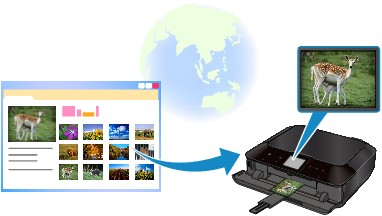
Printing Photos in Online Photo Album
You can access the internet photo sharing site using the operation panel of the machine and print the photo in online photo album (photos uploaded from devices such as computer).
 Important
-
If the firmware of the machine is updated, the screen, the operating procedure, and the menu function will be changed.
For details on the operating after the firmware update:
Before using the web service, see the terms of service.
![]() Notice for Web Service Printing
Notice for Web Service Printing
To access the photo sharing site from the machine, you have to register the account on the photo sharing site to the machine. Refer to the following and register the account.
![]() Registering the Account on Photo Sharing Site
Registering the Account on Photo Sharing Site
Important
-
LAN connection with the machine and internet connection are required to use this function.
-
Before you use this function, you have to get the account on the photo sharing site. For getting the account, refer to the photo sharing site.
-
Depending on the type of the photo, the photo may not be displayed on the touch screen or printed.
-
Flick the HOME screen, then tap
 Cloud.Important
-
If the firmware of the machine can be updated, a message prompting you to update may appear.
Update the firmware according to the message that appears.
For details on the operating of Cloud menu after the firmware update:
-
-
Tap the photo sharing site to use.
The machine accesses on the photo sharing site, then the online albums are displayed on the touch screen.
 Note
Note-
If you have not registered the account on the photo sharing site to the machine yet, the confirmation screen to register the account is displayed.
Tap Yes, then register the account.
-
For details on how to register the account, see Registering the Account on Photo Sharing Site.
-
After the account registration is complete, the confirmation screen to save the login name or e-mail address and password is displayed. Tap to select the setting. If you do not save the login name or e-mail address and password to the machine, tap Do not save.
-
-
If many online album are uploaded on the photo sharing site or the communication situation is poor, online albums may not be displayed on the touch screen correctly.
-
The created date display of the online album may differ between the touch screen of the machine and the computer. Additionally, the display order may differ.
-
-
Tap the online album to display.
The photo in the online album is displayed.
Note-
If many online album are uploaded on the photo sharing site or the communication situation is poor, the photo may not be displayed on the touch screen correctly.
-
The display order of photos in the online album may differ between the touch screen of the machine and the computer.
-
-
Specify the settings as necessary.
-
To select the photo to print:
Flick horizontally to select the photo.
You can also select the photo by tapping "A".
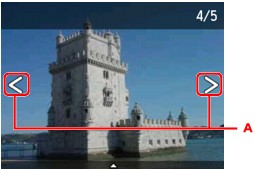
You can print a copy of the displayed photo by touching the Color button.
-
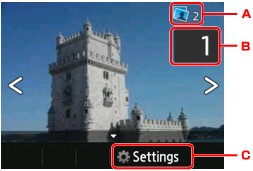
To change the number of copies, or the print settings:
Tap near the center of the displayed photo to display menus.
-
Total number of copies
Total number of copies is displayed.
When tapping, the Check total no. of copies screen is displayed and you can check the number of copies for each photo. On the Check total no. of copies screen, you can change the number of copies for each photo.
-
Number of copies
Tap to specify the number of copies.
Note-
You can specify the number of copies for each photo. Display the photo you want to print, then specify the number of copies when the desired photo is displayed.
-
-
Settings
Tap to display the Print settings screen.
-
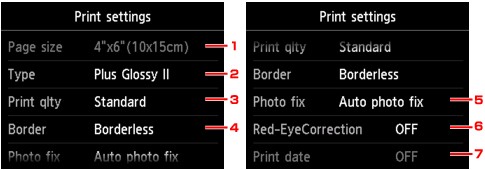
Page size
The page size is set to 4"x6"(10x15cm).
-
Type (Media type)
Select the media type of the loaded paper.
-
Print qlty (Print quality)
Select print quality according to the photo.
-
Border (Bordered/Borderless print)
Select bordered or borderless print.
-
Photo fix
When Auto photo fix is selected, the scene or person's face of a shot photo is recognized and the most suitable correction for each photo is made automatically. It makes a darkened face by backlight brighter to print. It also analyzes a scene such as scenery, night scene, person, etc. and corrects each scene with the most suitable color, brightness, or contrasts automatically to print.
Depending on the type of the photo, the photo may not be corrected.
Note-
As a default, photos on the photo sharing site are printed with auto correction applied.
-
If No correction is selected, photos are printed without correction.
-
-
Red-EyeCorrection
Corrects red eyes in portraits caused by flash photography.
Depending on the type of the photo, red eyes may not be corrected or parts other than the eyes may be corrected.
-
Print date
This setting is not available.
-
-
-
-
Touch the Color button.
The machine starts printing.
