Enlarging Copy with imageRUNNER ADVANCE
Copy scanned with imageRUNNER ADVANCE can be sent to the printer via FTP.
Enable FTP from Remote UI.
-
Start up Remote UI.
-
Select System info and LAN settings.
-
Select LAN settings.
-
Select Advanced setup.
-
Confirm the message and select Yes.
-
Select FTP settings.
-
Select Enable.
-
Select Use authentication check box and Set/change password check box, and then enter a user name and password.
The user name and password you enter in this step are used for FTP authentication. Enter the same value for FTP settings of imageRUNNER ADVANCE.
-
Select OK.
Please wait momentarily appears and returns to the startup screen.
-
Close web browser.
Perform enlarge settings on the operation panel.
-
Select
 Printer settings on HOME screen.
 -
Select Print settings.
-
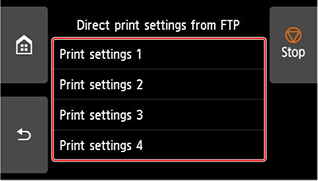
Select Direct print settings from FTP.
-
Select the number to set.
See the following two types of enlargement setting methods.
Scan and enlarge copy
-
Place the copy on the platen glass or feeder of imageRUNNER ADVANCE.
-
Select Scan and Send.

-
Select New Destination.

-
Select File.

-
Select FTP from the Protocol drop-down list.

-
Enter setting items.

Enter the printer's IP address as the Host Name.
 Note
Note- We recommend that you set a fixed IP address for your printer.
Enter "./folderN" in Folder Path. ("N" represents the print setting number specified in the Direct print settings from FTP screen on the printer.) For example, to enter the pathname for Print settings 1, enter "./folder1". For Print settings 2, enter "./folder2".
Use the same User Name and Password that you set for FTP authentication in the Remote UI.
-
Select OK.
-
Select the setting button for file format.

-
Select File Format.
Select PDF or JPEG.
 Note
Note- If you select PDF, remove the check from the Compact and Encrypt check boxes.
-
Specify the settings as necessary.

 Important
- Select 300x300 dpi or 600x600 dpi as the resolution.
-
Press
 (Start).
If you are placing your originals on the platen glass, press
(Start) to scan each original. -
When scanning is complete, select Start Sending.

Scanned originals are sent to the printer and printing starts.
![]() Note
Note
- It is recommended to register the setting contents in Favorite Settings.
