
Placing/Removing a Printable Disc
Before Placing a Printable Disc
A printable disc differs from regular disc (BD/DVD/CD, etc.) in that its label surface has been specially processed or printing by an inkjet printer.
The following items are needed to print onto the printable disc.
-
Multi-purpose tray (supplied with the printer)

The multi-purpose tray is stored in the multi-purpose tray storage compartment of the paper output tray.
-
4.72 in. (12 cm) printable disc

Obtain a printable disc with a label surface compatible with inkjet printing.
Placing a Printable Disc
To print onto a printable disc, place it on the supplied multi-purpose tray, and then insert it into the printer.
This procedure also applies to printing from a computer.
![]() Important
Important
-
Do not mount the multi-purpose tray until the message prompting you to load the printable disc appears. Doing so can damage the printer.
![]() Note
Note
-
If test printing is executed onto test printing paper, depending on the paper type, the printer may not be able to read its size correctly, preventing the border areas from being printed. Test printing paper should be used for purposes of checking the envisioned layout.
-
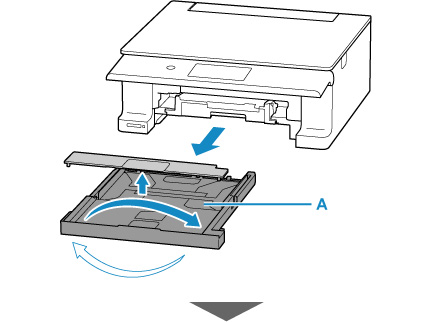
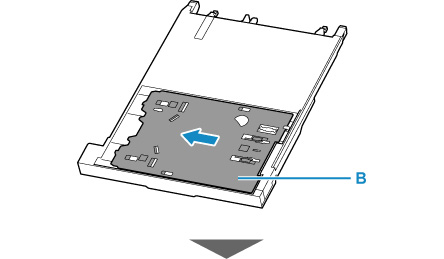
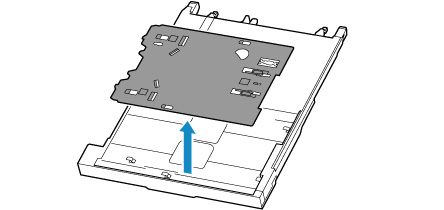
When message prompting you to load printable disc appears, detach multi-purpose tray (B) from back of cassette (A).
Insert the removed cassette back into the printer.
-
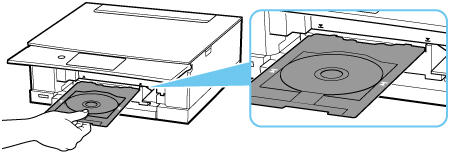
Place printable disc on multi-purpose tray.
 Important
-
Check that there is no dirt on the multi-purpose tray before placing a printable disc on it.
-
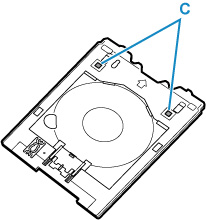
When placing a printable disc on the multi-purpose tray, do not touch the printing surface of the disc or the reflectors (C) on the multi-purpose tray.
-
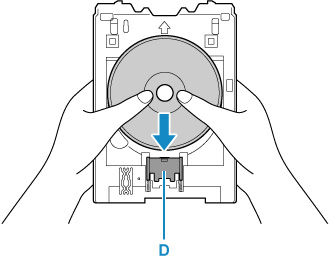
WITH PRINT SIDE FACING UP, place printable disc, and press it against lock (D) at bottom.
-
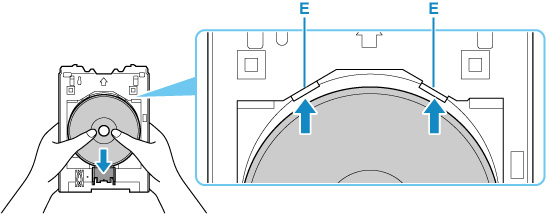
While pressing down lock with printable disc, insert top of printable disc into slits (E).
-
-
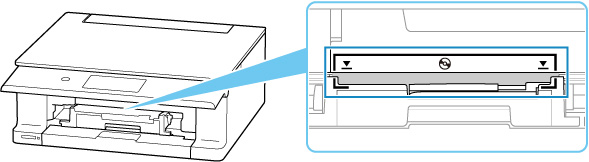
Check the placement location of the multi-purpose tray.
-
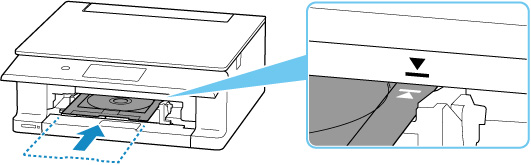
Place multi-purpose tray on the printer.
-
Insert multi-purpose tray straight in in horizontal direction until arrow (
 ) on the printer is approximately aligned with arrow (
 ) on multi-purpose tray.Important
-
Do not insert the multi-purpose tray beyond the arrow (
) on the printer.
-
![]() Note
Note
-
The multi-purpose tray may be ejected after a certain amount of time passes. In such a case, follow the on-screen instructions to place the multi-purpose tray again.
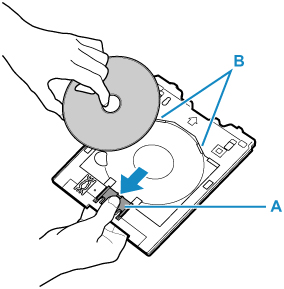
Removing a Printable Disc
-
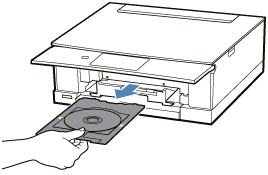
Pull out multi-purpose tray.
-
While pressing down lock (A), take out printable disc from slits (B) on multi-purpose tray, and remove it.
Important-
Do not touch the printing surface when removing the disc from the multi-purpose tray.
 Note
Note-
Allow the printing surface to dry before removing the disc. If you see printing on the multi-purpose tray or on the transparent parts of the inner or outer diameters of the printable disc, wipe them clean after the printing surface has dried.
-
-
Store multi-purpose tray under cassette.
