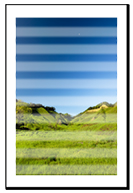
 Colors in printed images are uneven


-
Check 1 Does the paper loaded on the printer match the media type selected in the printer driver?
When printing with the media type specified in the printer driver, load the specified media type in the printer.
- Loading the Upper Roll on the Printer
- Loading the Lower Roll on the Roll Unit (Option)
- Loading Sheets in the Printer
When printing with the media type specified in the printer driver, load the specified media type in the printer.
-
To stop printing, tap Stop.
-
Change the paper type in the printer driver and try printing again.
 Note
Note-
When Auto (Use Printer Settings) is selected for the media type, printing is performed with the media type loaded in the printer.
-
Click Get Information to reflect the paper information set in the printer to the printer driver.
-
Check 2 When loading paper in the printer, is the media loaded the same as the media type selected on the touch screen?
Select the correct media type in the touch screen menu when loading paper in the printer.
-
Check 3 Is the Print head position adjusted correctly?
Adjust the Print head position.
-
Check 4 Is the feed amount adjusted correctly?
Adjust feed amount.
-
Check 5 Colors in printed images may be uneven if the Print Quality setting is too low
If using Windows, select Advanced Settings from the Main tab of the printer driver, and then select a higher Print Quality setting.
If using macOS, select Quality & Media in the printer driver, and then select a higher Print Quality setting.
-
Check 6 Colors in printed images may be uneven on the boundary between shades if there are dark and light areas in an image
Prints on the same page while switching between Bidirectional printing and Unidirectional printing. Therefore, color unevenness may occur when switching. Using the unidirectional printing function may reduce color unevenness in this situation.
Follow the steps below for unidirectional printing.
-
Windows
Open Paper Detailed Settings from the Main tab of the printer driver, and then select Unidirectional Printing.
-
macOS
Open Advanced Paper Settings in the printer driver, and then select Unidirectional Printing.
-
-
Check 7 If printing borderless, colors in printed images may be a little uneven at the leading edge of the paper because printing is interrupted to cut the paper
Set the printer driver Automatic Cutting settings to No, and then print. Doing this prints only the left and right sides borderless. Cut the top and bottom borders with a cutting implement such as scissors after the printed materials are output and cut.
 Note
Note-
Selecting a higher Print Quality in the printer driver Advanced Settings may resolve the problem.
-
-
Check 8 Does this paper curl easily?
Colors in printed images may be uneven at the leading edge of paper that curls easily. Change the Transport unit vacuum strength in the touch screen to increase the grip on the paper, or set a margin of at least 0.8 inches (20 mm) at the front edge of the paper.
-
Check 9 Color may be uneven if printing materials were stacked while drying
To avoid uneven colors, we recommend drying each sheet separately.
-
Check 10 Is Ink drying target area for Pause between scans in the touch screen menu set to Leading edge?
If the Ink drying target area for Pause between scans is set to Leading edge, color may be uneven approximately 4.3 to 6.3 inches (110 to 160 mm) from the front edge of the paper. (The position depends on the Print Quality settings)
On the home screen of the touch screen, tap the paper setting display area, tap the paper feed slot where the paper whose settings to change is set, and then tap Paper settings > Advanced > Pause between scans > Ink drying target area and set to Overall.
However, note that printing will now take longer.
-
Check 11 Make sure you are not printing cut sheet with AirPrint (macOS)
When you print cut sheets with AirPrint, uneven or streaked colors may occur at the trailing edge of the sheet. To print cut sheets with AirPrint, from the touch screen menu, tap Printer settings > Paper-related settings > Keep margin at cut sheet end.
 Note
Note- Set Keep margin at cut sheet end to Enable to increase the margin at the trailing edge of the sheet.

