
Replacing the Print Head
If the print quality is not improved even after maintenance such as cleaning, replace a print head.
Replacing Procedure
When you need to replace a print head, follow the procedure below.
![]() Important
Important
-
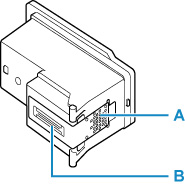
Do not touch the electrical contacts (A) or print head nozzle (B) on a print head. The printer may not print properly if you touch them.
-
Replace a print head immediately and do not leave the printer with the print head removed.
-
Press the Setup button, use the

 button to select Maintenance, and then press the OK button.
 -
Use the
button to select Start replacement, and then press the OK button.
-
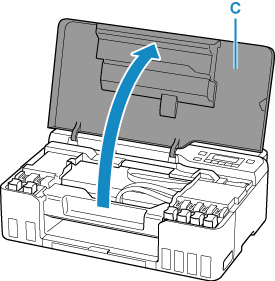
Open top cover (C).
 Important
-
If the ink stains the print head and/or the inside of the printer, wipe them using a soft cloth dampened with water before installation. Be careful not to get ink on your clothing or surroundings when replacing the print head.
-
Do not touch the metallic parts or other parts inside the printer.
-
-
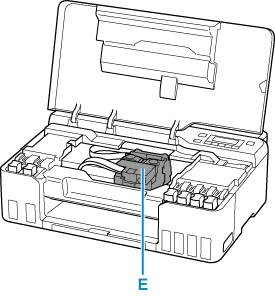
Turn the ink valve lever (D) to the left.
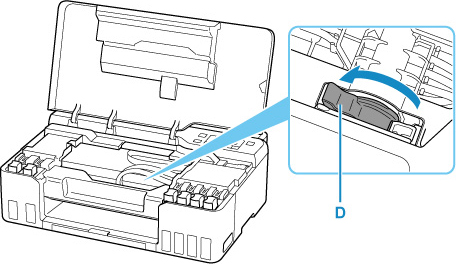
The print head holder (E) moves.
 Caution
-
Do not hold the print head holder to stop or move it forcibly while the print head holder is working. Do not touch the print head holder until it stops completely.
-
-
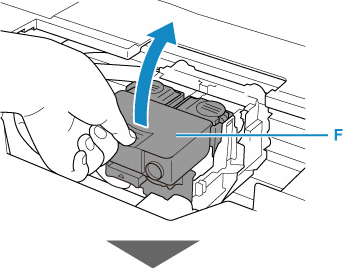
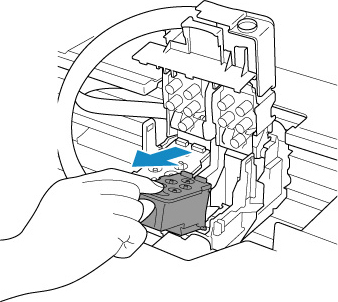
Remove the print head.
-
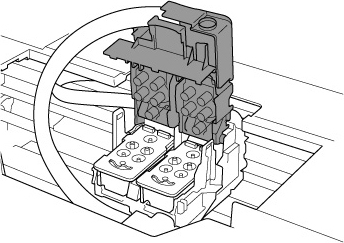
Pinch the tabs and open the print head locking cover (F).
-
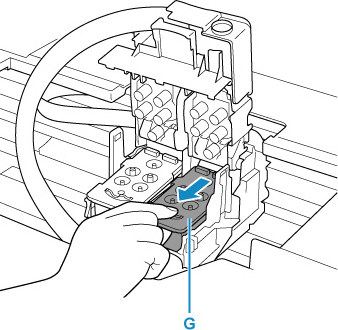
Pull the print head (G) and shift it slightly toward you.
-
Take out the print head.
Important-
Handle the print head carefully to avoid staining of clothing or the surrounding area.
-
-
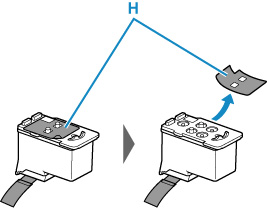
Prepare a new print head.
-
Take a new print head out of its package and peel the label (H) gently.
-
Remove the protective tape (I) gently.
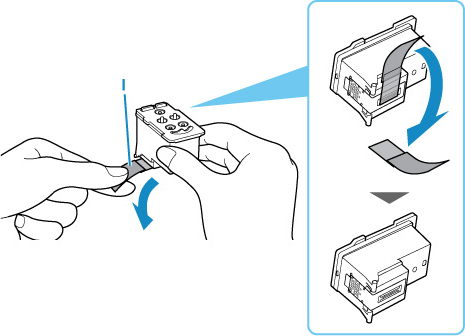
Important-
Do not touch the electrical contacts or print head nozzle on a print head. The printer may not print properly if you touch them.
-
-
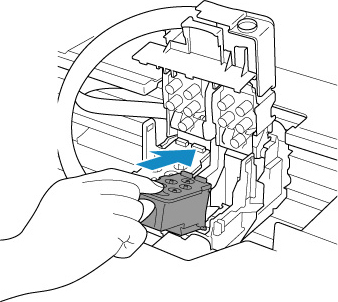
Install the print head.
-
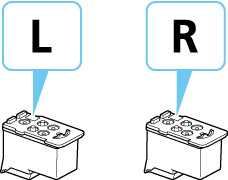
Put a new print head in the print head holder.
Install the print head "L" on the left and the print head "R" on the right.
-
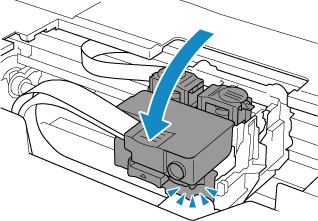
Close the print head locking cover to lock the print head into place.
Push down the print head locking cover until it clicks.
-
-
Push the joint buttons (J).
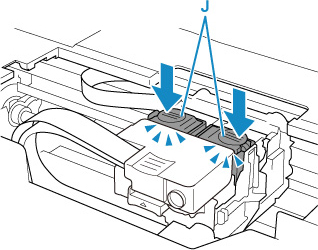 Important
-
Push down the joint buttons until they click. The printer may not print.
-
Check that both the left and right joint buttons are pushed down.
-
-
Turn the ink valve lever to the right.

-
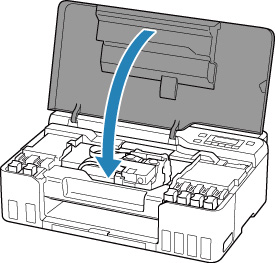
Close the top cover.
 Note
Note-
If the error message appears on the LCD after the top cover is closed, take appropriate action.
-
If the print head is out of alignment, as indicated by misaligned printed ruled lines or similar symptoms, adjust the print head position.
-
