
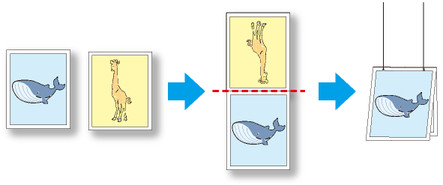
Prints using Folded Duplex
This prints 2 pages consecutively. Folding back the paper at the fold lines of the center substitutes for duplex printing.
This can be used such as for advertising posters that are suspended from the ceiling.
-
Select an object.
Select two objects from the layout area of Free Layout.
-
Open Folded Duplex.
Select Folded Duplex from the Edit menu of Free Layout.
Open the Folded Duplex Window and arrange the selected objects in the layout area.
-
Open Finished Size Settings dialog box.
Open the Finished Size Settings Dialog Box from the Edit menu.
-
Specify finished size.
Select Fit Roll Paper Width orSpecify Folded Size in Finished Size.
 Note
Note-
Rotate Page 90 degrees (Conserve Paper) is also available whenSpecify Folded Size is selected.
-
-
Save settings.
Click OK to save the settings.
-
Open Binding Settings dialog box.
Open the Binding Settings Dialog Box from the Edit menu.
-
Select Binding Edge.
Select Bottom or Top in Binding Edge.
-
Set Binding width.
Specify the Binding width in Binding.
-
Set printing method of fold lines.
Click the Print Fold Lines check box, and then set Fold Line Color and Fold Line Type.
Note-
Clicking the Only Print Center and Edges check box prints the fold lines only along the center and both edges.
-
-
Save settings.
Click OK to save the settings.
-
Start printing.
Confirm the print setting and begin printing.
