
Paper Is Jammed inside Printer
If the jammed paper tears and you cannot remove the paper either from the paper output slot or from the rear tray, or if the jammed paper remains inside the printer, first remove paper from inside of the scanning unit / cover.
If you cannot remove the paper from inside of the scanning unit / cover, remove paper from the bottom side of the printer.
Removing Jammed Paper from Inside of Scanning unit / Cover
Remove the paper following the instructions below.
![]() Note
Note
- If paper becomes jammed during printing and you need to turn off the printer to remove it, press the Stop button to stop the printing before you turn off the printer.
-
Turn off printer and unplug it.
-
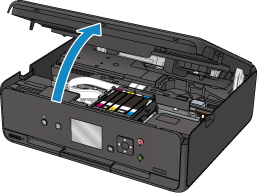
Open scanning unit / cover.
 Important
-
Do not touch white belt (A).
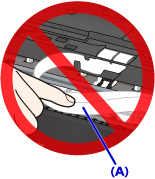
If you soil or scratch this part by touching it with paper or your hand, it could damage the printer.
-
-
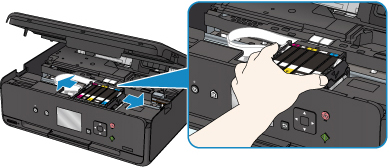
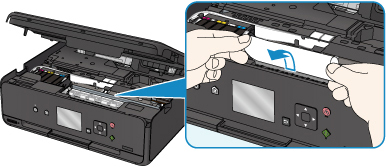
Check if jammed paper is under print head holder.
If the jammed paper is under the print head holder, move the print head holder to the far right or left, whichever makes it easier to remove the paper.
When moving the print head holder, hold the top of the print head holder and slide it slowly to the far right or left.
-
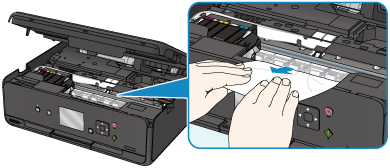
Hold jammed paper firmly in both hands.
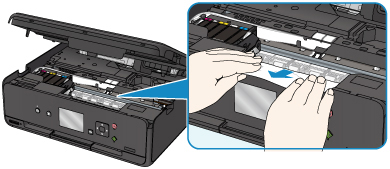
If the paper is rolled up, pull out it.
-
Slowly pull out paper, so as not to tear it.
Pull out the paper at an angle of about 45 degrees.
-
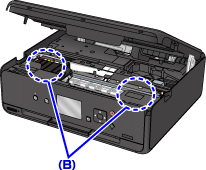
Make sure all jammed paper is removed.
If the paper tears when you pull out it, a bit of paper may remain in the printer. Check the following and remove any remaining paper.
- Any paper left under the print head holder?
- Any small bits of paper left in the printer?
- Any paper left in the left and right empty spaces (B) in the printer?
-
Close scanning unit / cover firmly.
All jobs in the print queue are canceled. Redo the printing.
 Note
Note- When reloading the paper, make sure you are using suitable paper and loading it correctly. If a paper jam message appears on the LCD or on your computer screen when you resume printing after removing all the jammed paper, there may be some paper still inside the printer. Check the printer again for any remaining bits of paper.
Removing Jammed Paper from Bottom Side of Printer
Remove the paper following the instructions below.
![]() Note
Note
- If paper becomes jammed during printing and you need to turn off the printer to remove it, press the Stop button to stop the printing before you turn off the printer.
-
Turn off printer and unplug it.
-
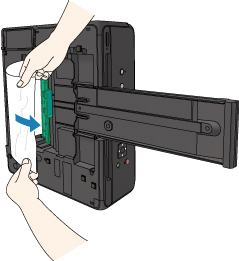
Stand printer up on its right side.
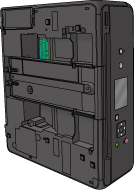 Important
- Make sure the document cover is closed before you stand the printer up on its side.
- Stand the printer on a wide and flat surface such as a desk.
- Hold the printer securely with both hands to stand it up, being careful not to hit anything.
-
Pull out paper output tray.
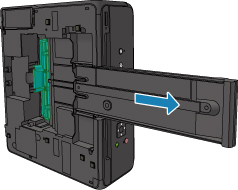
-
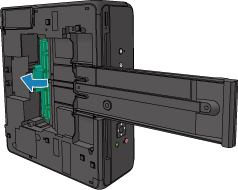
Open bottom cover.

-
Hold jammed paper firmly in both hands.
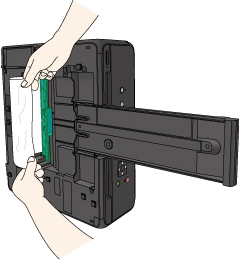
-
Slowly pull out paper, so as not to tear it.
-
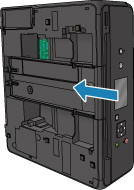
Close bottom cover.
-
Retract paper output tray.
-
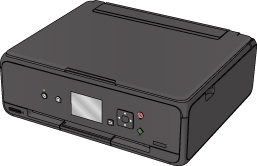
Return printer to its original position.
All jobs in the print queue are canceled. Redo the printing.
Note- When reloading the paper, make sure you are using suitable paper and loading it correctly. If a paper jam message appears on the LCD or on your computer screen when you resume printing after removing all the jammed paper, there may be some paper still inside the printer. Check the printer again for any remaining bits of paper.
If the measures above do not solve the problem, contact your nearest Canon service center to request a repair.
