
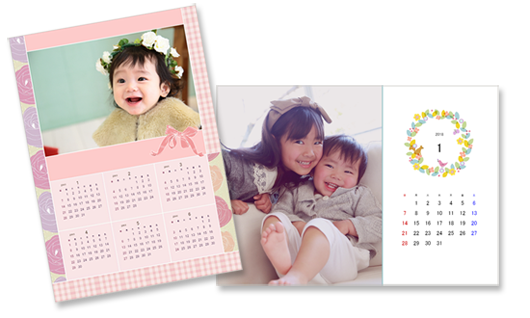
Printing Calendars
Create and print personalized calendars from your memorable photos.
-
Check that printer is on.
-
In New screen, click Calendars.
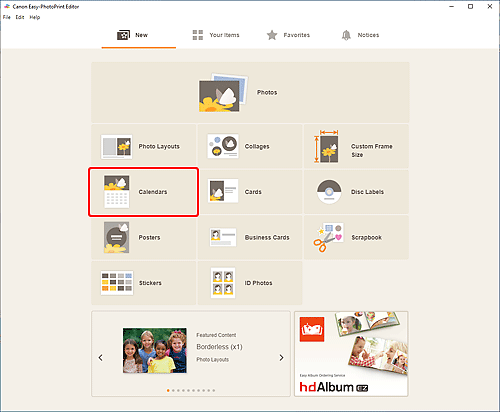
The view switches to the Select template screen.
-
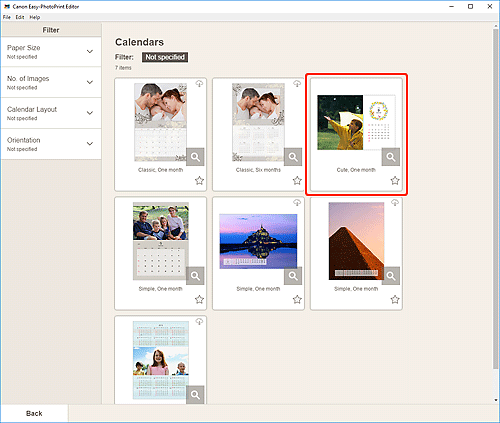
Select the template you want to use.
 Note
Note- To narrow down the templates, set the conditions in the Filter area.
The Select Paper Size screen appears.
-
Select paper size and click Next.

The view switches to the Photo Locations screen.
Note- You can also print photos by enlarging/reducing them to the roll paper width. In Windows, it can be set in B: Print Settings Area in the Print Settings screen.
-
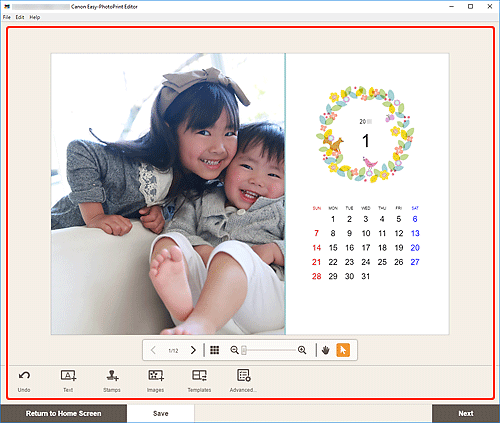
Select the photo(s) you want to use for item.
The view switches to the Item edit screen.
-
Click Advanced....
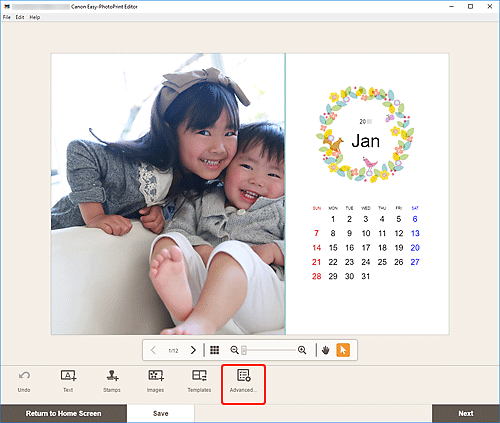
The Calendar Settings screen appears.
-
Set calendar holidays and display style.
Click OK to return to the Item edit screen.
-
Edit item according to preference.
 Note
Note- To save the item being edited, click Save.
-
Click Next.
The view switches to the Print Settings screen.
Windows
-
Specify printer and paper to use, and other settings.
 Note
Note- Click Create Tiling/Poster to start Easy-Layout Editor with which you can print over multiple sheets of paper and combine them to create a large poster. If Easy-Layout Editor is not installed, follow the on-screen instructions to download and install it from the web page. For Easy-Layout Editor, see Easy-Layout Editor Guide.
- Create Tiling/Poster does not appear depending on your printer.
-
Click Print.
macOS
-
Set Auto photo fix, Red-eye correction, and number of copies to print.
-
Click Next.
The Print dialog appears.
-
Specify printer and paper to use, and other settings.
Note- When printing on Light Fabric Iron-on Transfers using AirPrint, you may need to set the flip horizontally setting depending on the printer. To set the flip horizontally setting, select Layout from the pop-up menu, and then select the Flip horizontally checkbox.
- For details on the Print dialog, see Help of macOS.
-
Click Print.
