
User Notification Settings Dialog Box
You can add, delete, or update users who will be notified that print jobs are finished or have stopped. You can check a list of users that have been added.
To open the User Notification Settings dialog box, select Smartphone/Tablet Notifications, and then User Notification Settings from the File menu.
![]() Note
Note
- Before the User Notification Settings dialog box appears, confirm the network connections and users that have been added to receive notifications. A progress bar appears during the confirmation. Wait until the confirmation is complete.
- If an error occurs in the network connections, a message appears. Do the operations according to the instructions in the message.
- If there is an error with an added user, the details about the error appear in the Status field. Do the operations according to the instructions that appear.
- The smartphone and tablet notification function is disabled for users who have not received notifications for a certain length of time. To receive notifications again, reregister in User Information Settings Dialog Box.
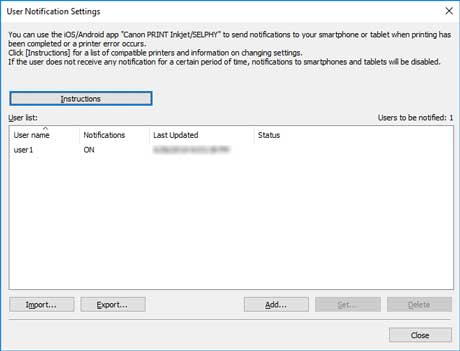
- Instructions button
-
Clicking this displays the topic "Sending Notification of Print Job or Printer Status to Smartphone/Tablet PC."
- User list
-
The users you added to receive notifications appear in the list.
-
- Users to be notified
-
The total number of users that appear in User list are displayed.
- User name
-
The user names you added to receive notifications appear.
- Notifications
-
The status of the function for notifying smartphones appears.
ON: The function is enabled.
OFF: The function is disabled.
- Last Updated
-
The date when the settings were last updated appears.
- Status
-
Shows the status of the user information on the notifications server.
- Import button
-
Imports the users to notify from a file.
The imported users appear in User list.
 Note
Note- Using the Import button to import a file opens the Select User screen. You can select which users to import in the Select User screen. Add a checkmark to the users to import, and then click the Add button.
- Export button
-
Exports the users that appear in User list to a file.
Note- You cannot click this button if there are no users displayed in the User list.
- Add button
-
The Add User dialog box appears, and you can add users who will be notified that print jobs are finished or have stopped.
- Set button
-
The User Information Settings dialog box appears, and you can change the settings for users selected in User list.
Note- You cannot click this button if there are no users selected in the User list.
- Delete button
-
The users selected in User list are deleted.
Note- You cannot click this button if there are no users selected in the User list.
