
Make a line connection.
-
Connect the supplied phone cord to the printer's jack (labeled
 on the back).
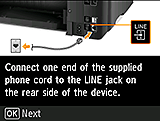
-
Press the OK button.
-
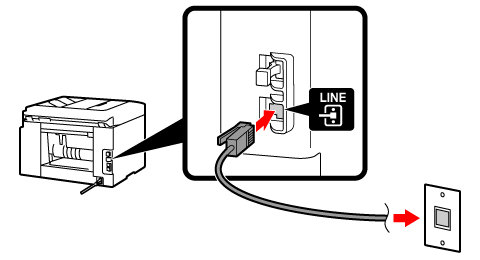
Connect the other end of the phone cord to the phone line.
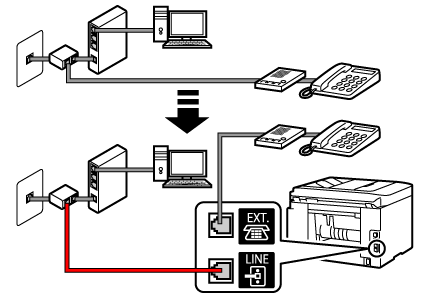
<Connection example>
xDSL/CATV modem with built-in splitter + Telephone with built-in answering machine

Splitter + xDSL/CATV modem + Telephone with built-in answering machine

xDSL/CATV modem with built-in splitter + Telephone with external answering machine
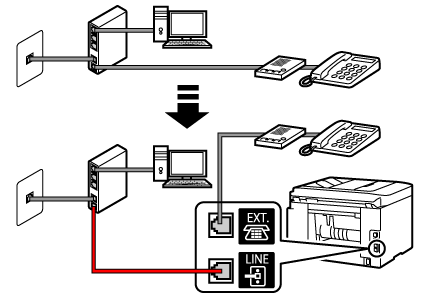
Splitter + xDSL/CATV modem + Telephone with external answering machine
-
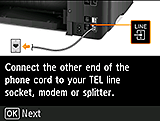
Press the OK button.
-
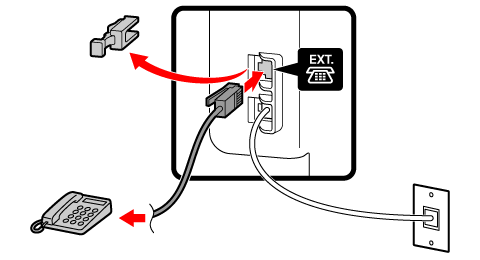
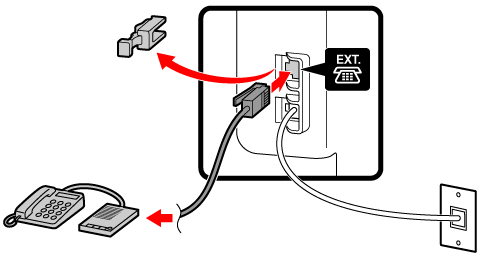
Remove the cap from the printer's jack (labeled
 on the back), and then connect the printer and the telephone with a phone cord.
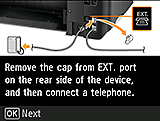
<Connection example>
Built-in answering machine
External answering machine
-
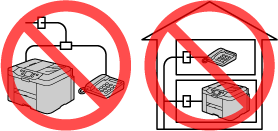
If you have only one phone line contract, parallel connection of a telephone and fax machine to different wall jacks (branch connection) is not possible.
-
-
Press the OK button.


