
 Setting Up - Setting Sender Information and Date and Time
Set the sender information and the date and time.
Register a user name and your fax/phone number to print them as the sender information together with the date and time on the fax recipient's paper.
![]() Important
Important
- We recommend that you register the user information because faxes without sender information may be rejected by the recipient's fax machine.
-
Select
 (HOME).
 -
Tap
 (Setup).
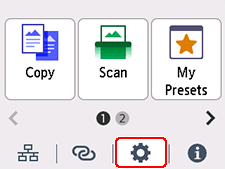
-
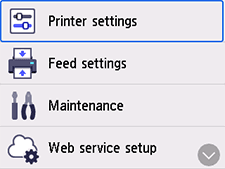
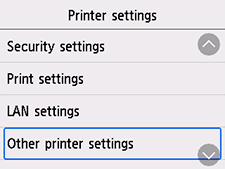
Tap Printer settings.
-
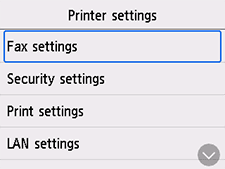
Tap Fax settings.
-
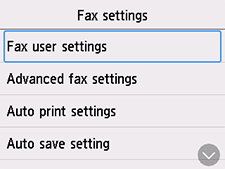
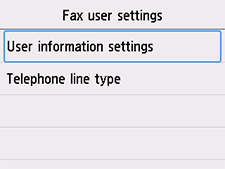
Tap Fax user settings.
-
Tap User information settings.
-
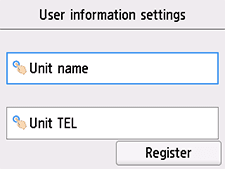
Tap Unit name.
-
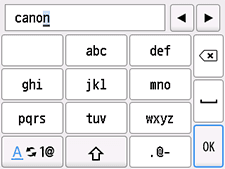
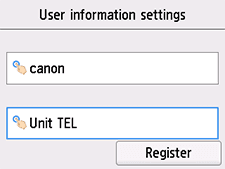
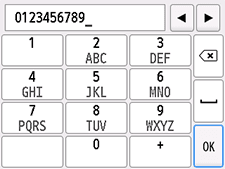
Use the on-screen keyboard to enter the Unit name (user name), and then tap OK.
-
Tap Unit TEL.
-
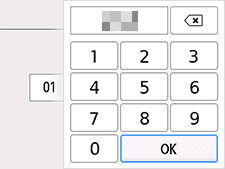
Use the on-screen keyboard to enter the telephone number, and then tap OK.
-
Check the entered details, and then tap Register.

The sender information settings are completed.
Next, set the date and time. -
Select
(HOME). -
Tap
(Setup). -
Tap Printer settings.
-
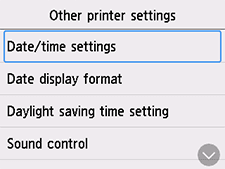
Tap Other printer settings.
-
Tap Date/time settings.
-
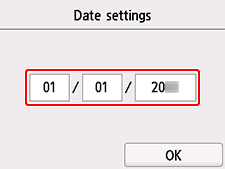
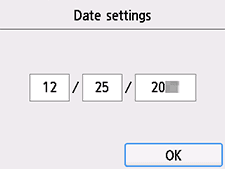
Tap MM/DD/YYYY.
 Note
Note- What you see in the screen varies depending on the country or region where you purchased the printer.
-
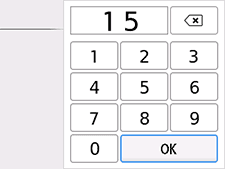
Enter the month/day/year (last two digits), and then tap OK.
-
Check the entered details, and then tap OK.
-
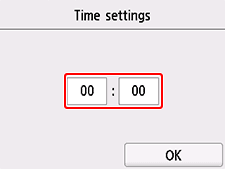
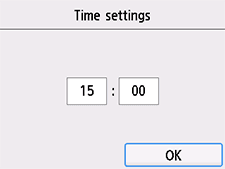
Tap the time.
-
Enter the hour (24-hour format)/minute, and then tap OK.
-
Check the entered details, and then tap OK.
The date and time settings are completed.
Next, make advanced settings of the receive mode. Go to the next page.
