
 Setting Up - Connecting Phone Line
Make a line connection and various settings for using the fax functions.
-
Make sure the printer is turned on.
-
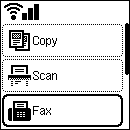
Use the

 buttons to select Fax.
If Fax is not displayed, press the
 HOME button.
 -
Press the OK button.
Easy setup starts.
-
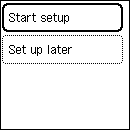
Make sure Start setup is selected, and then press the OK button.
-
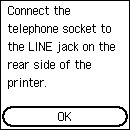
Connect the supplied phone cord to the printer's jack (labeled
 on the back).
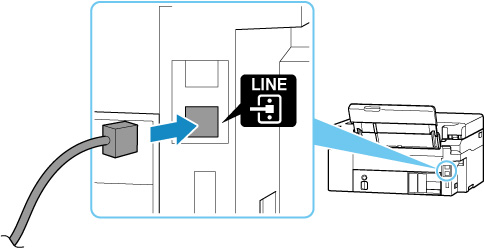
-
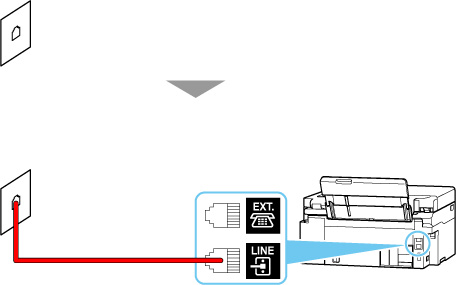
Connect the other end of the phone cord to the wall jack.
<Connection example>
-
Press the OK button.
-
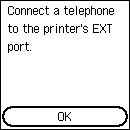
Press the OK button since you will not connect a telephone to the printer.
-
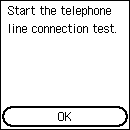
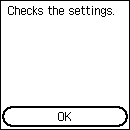
Press the OK button to perform a connection test for checking if the telephone line is connected correctly.
If none of the above measures solve the problem, the printer may be defective, or the problem may be caused by some other reason.
As we need to check the detailed status, please contact your nearest Canon service center.
-
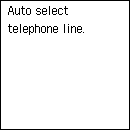
If the telephone line is connected correctly, the telephone line type is identified automatically.
-
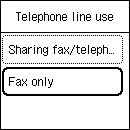
Select Fax only, and then press the OK button.
-
Press the OK button.
-
Check the specified settings, and then press the OK button.
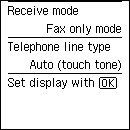
The phone line connection is completed.
Next, set the sender information and the date and time. Go to the next page.
