Scannen mit Chromebook
The following procedure is an example for Chrome OS 128.
-
Connect printer and Chromebook.
Scanning over a Network
Check that the printer and Chromebook are connected to the same network.
If the printer is not connected to the network, using a smartphone, Windows, or Mac, follow the steps below to connect the printer to the network.
-
From smartphone, Windows, or Mac, access the following page.

https://ij.start.canon
-
Select
 Set Up, and then follow on-screen instructions to complete setup.
Scanning with a USB Connection
Connect the printer and Chromebook with a USB cable.
-
-
Scan.
-
Click
 (Time) at the bottom right.
-
Click
 (Settings).
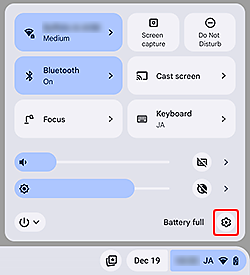
-
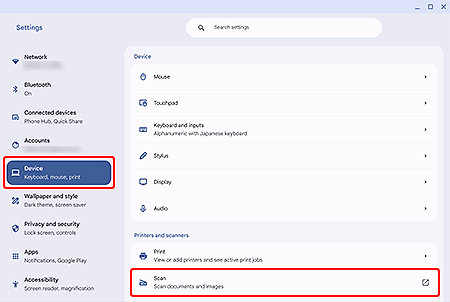
In the Settings screen, click Device, and then select Scan.
Printer search starts; when complete, the scan window opens.
-
Place item, specify scan settings, and then scan.
 Hinweis
-
Sie können auch über die Canon-App Canon PRINT scannen.
-
Überprüfen Sie die Netzwerkverbindung des Druckers.
Stellen Sie sicher, dass der Drucker und das Chromebook mit dem gleichen Netzwerk verbunden sind.
-
Installieren und starten Sie Canon PRINT.

- Platzieren Sie das Objekt.
- Tippen Sie auf Scannen (Scan).
- Überprüfen Sie die Einstellungen und tippen Sie auf Scannen (Scan).
-
-
