
Changing the Connection Mode
You can switch the connection mode or change the network name (SSID) and other settings on the printer.
Setup is required when connecting to the printer for the first time. Return to the application software and set up the printer.
-
Press
 (HOME) on the printer.
-
Use the
 or
or  button to select Settings and press the OK button.
 -
Select LAN settings and press the OK button.
 Note
Note- If the administrator mode is enabled, the setting screen may not appear for standard users. Ask your network administrator for the setup.
-
Select the connection mode you want to use and press the OK button, and then proceed with the setup.
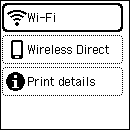
When Wi-Fi is selected
Select Wi-Fi setup and press the OK button, and then select a Wi-Fi setup method.
When Changing Wireless Direct Settings
Press ![]() (HOME), and then select Settings > LAN settings > Wireless Direct.
(HOME), and then select Settings > LAN settings > Wireless Direct.
In the displayed screen, select Change network name (SSID), Change password, or 2.4GHz/5GHz switch, press the OK button, and then change the network name (SSID), password, or frequency band.
![]() Note
Note
- If the administrator mode is enabled, the setting screen may not appear for standard users. Ask your network administrator for the setup.
- Wireless Direct connects a device (such as a computer) to the printer at 2.4 GHz.
To connect at 5 GHz, select 5GHz in the 2.4GHz/5GHz switch screen.
Depending on your country or region, this printer does not support Wireless Direct using the 5 GHz band.
